
How to Translate Subtitles and Grow Your Audience Abroad
Most of the world doesn't speak the language you made your video in. Subtitles are the cheapest way to reach the people who don't: no re-shoot, no voice actors, no second edit.
AirCaption transcribes your audio into captions, then turns those captions into subtitles in more than 80 languages at once, in the background, while you carry on editing.
There's a free allowance every month, so you can try it without a subscription.
What You'll Need
- A Mac or Windows computer. AirCaption is free to download
- A video or audio file.
mp4,mov,mkv,mp3,wav,m4aand most other common formats, up to three hours - About ten minutes. No subscription needed to try it
Part 1: Create captions in the original language
Install AirCaption
Download AirCaption and run the installer. There are downloads for Mac on Apple Silicon and Intel, and Windows.
There's no account to create. Pick a media file to start transcribing.
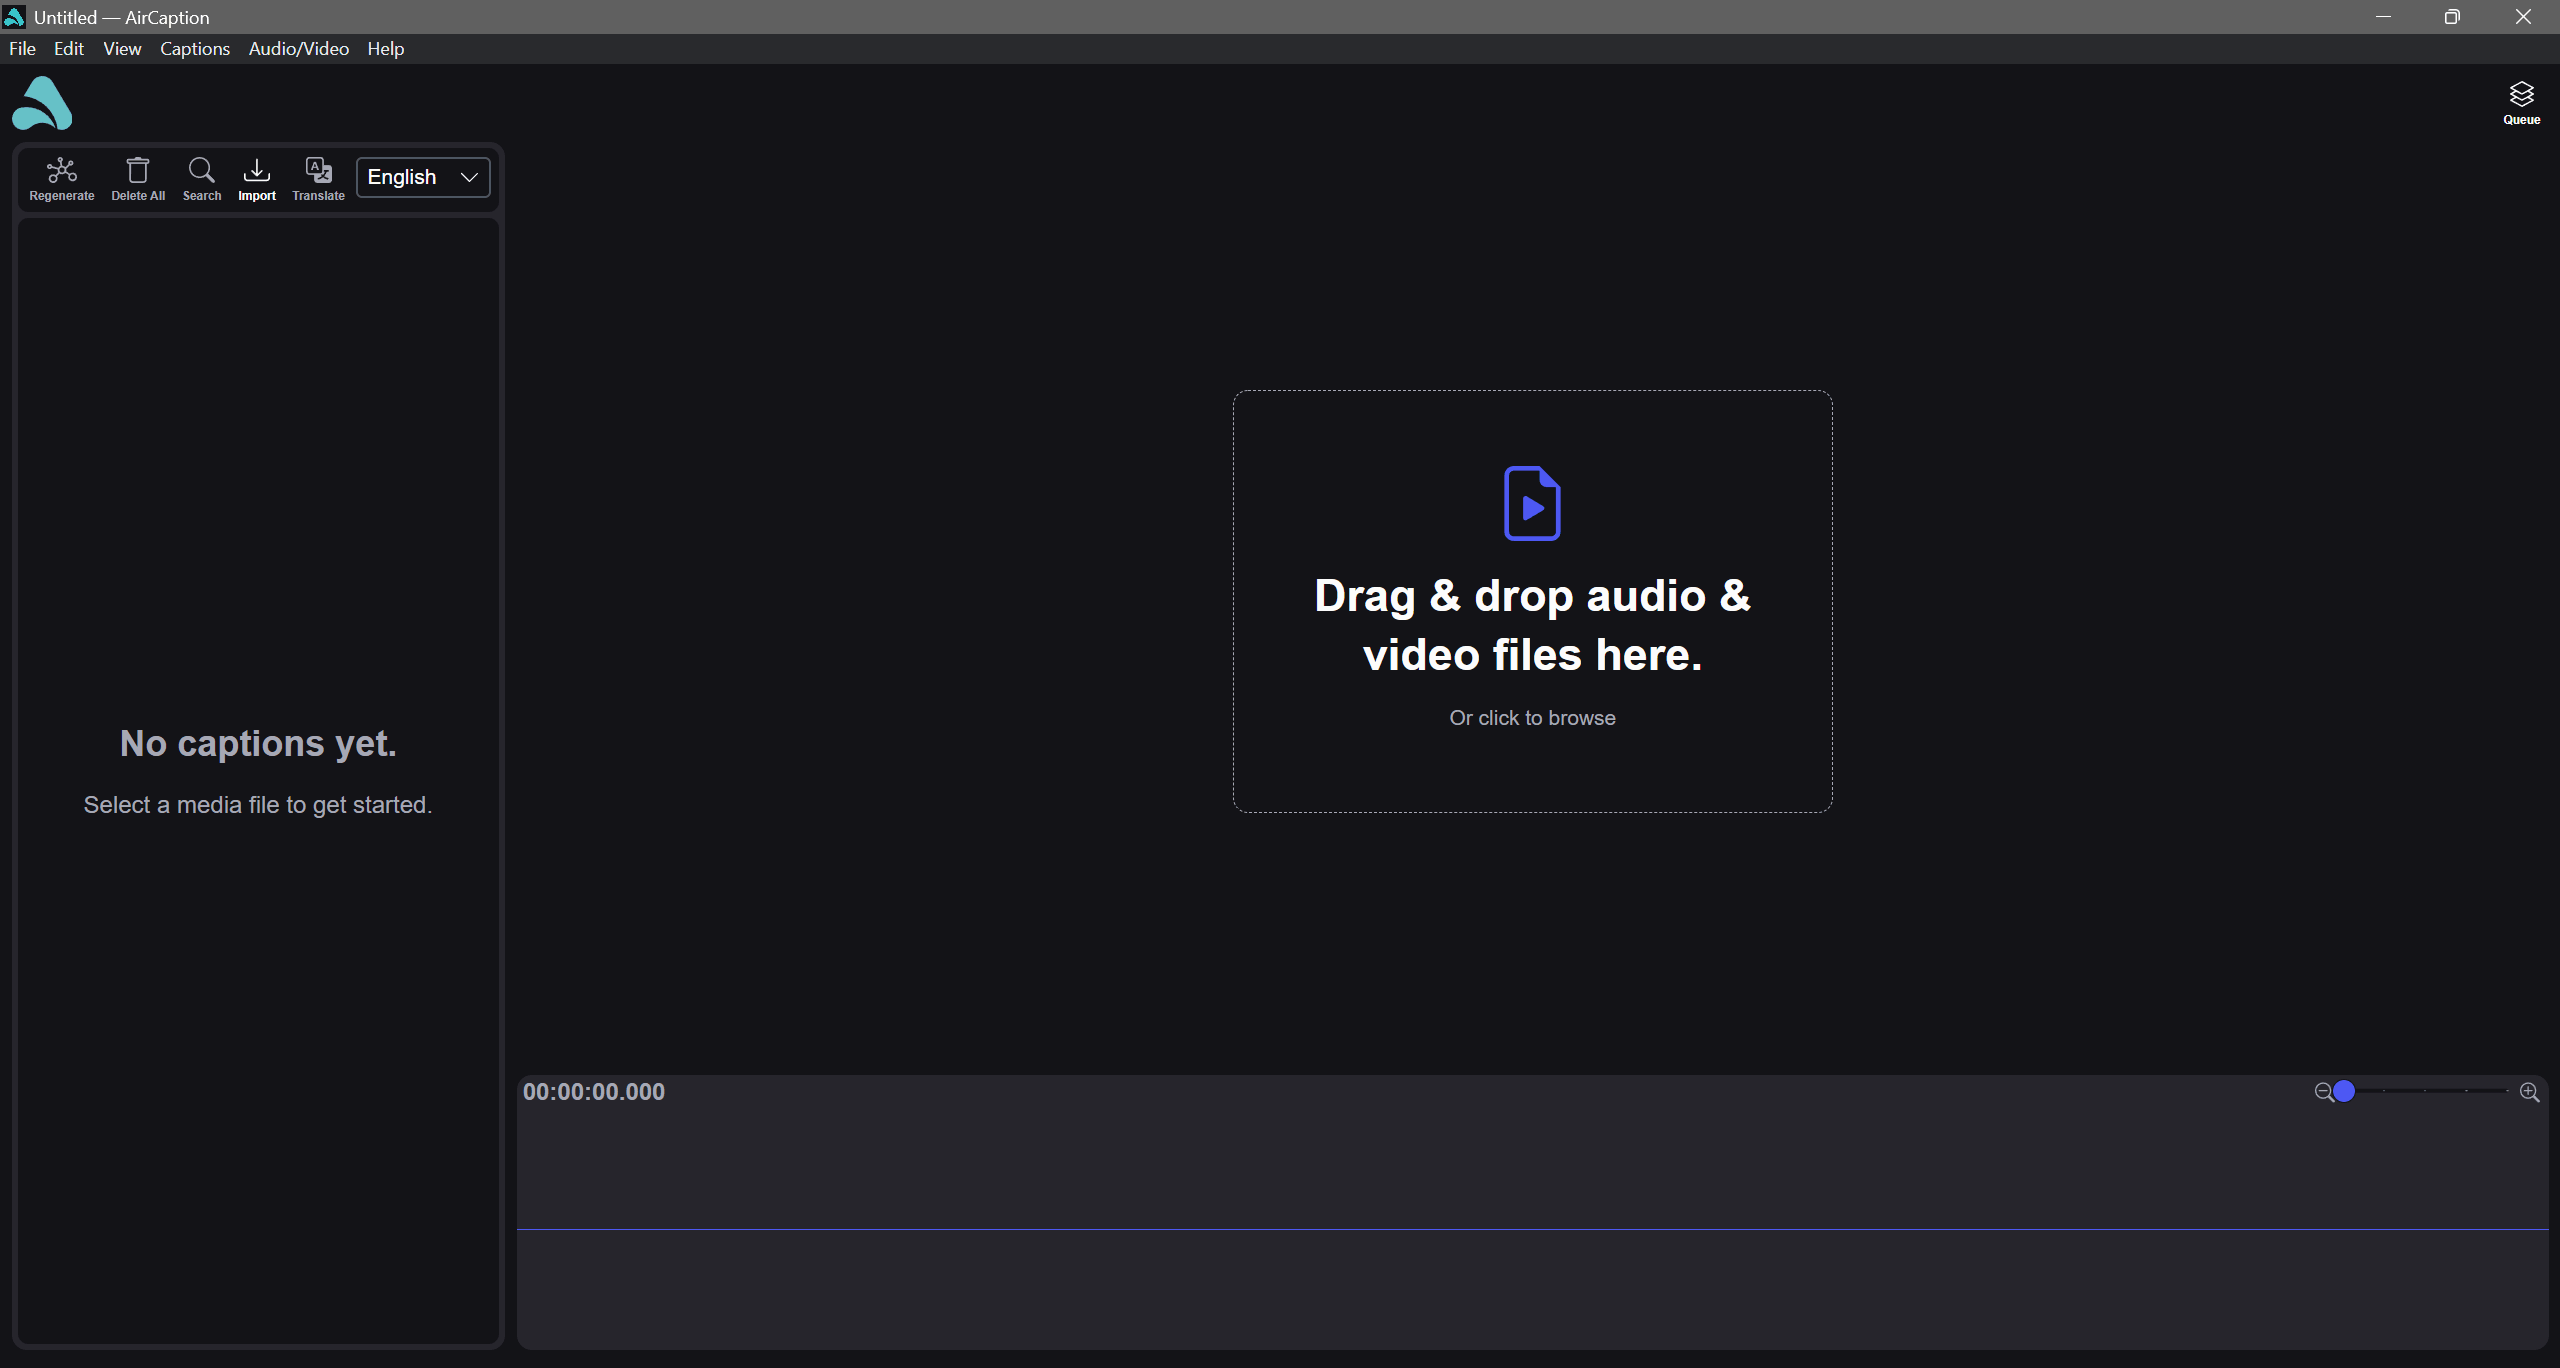
Open your video or audio
Drag your file onto the window, or use File → Open….
The player appears on the right and the waveform along the bottom. Captions will fill the panel on the left once you've generated them.
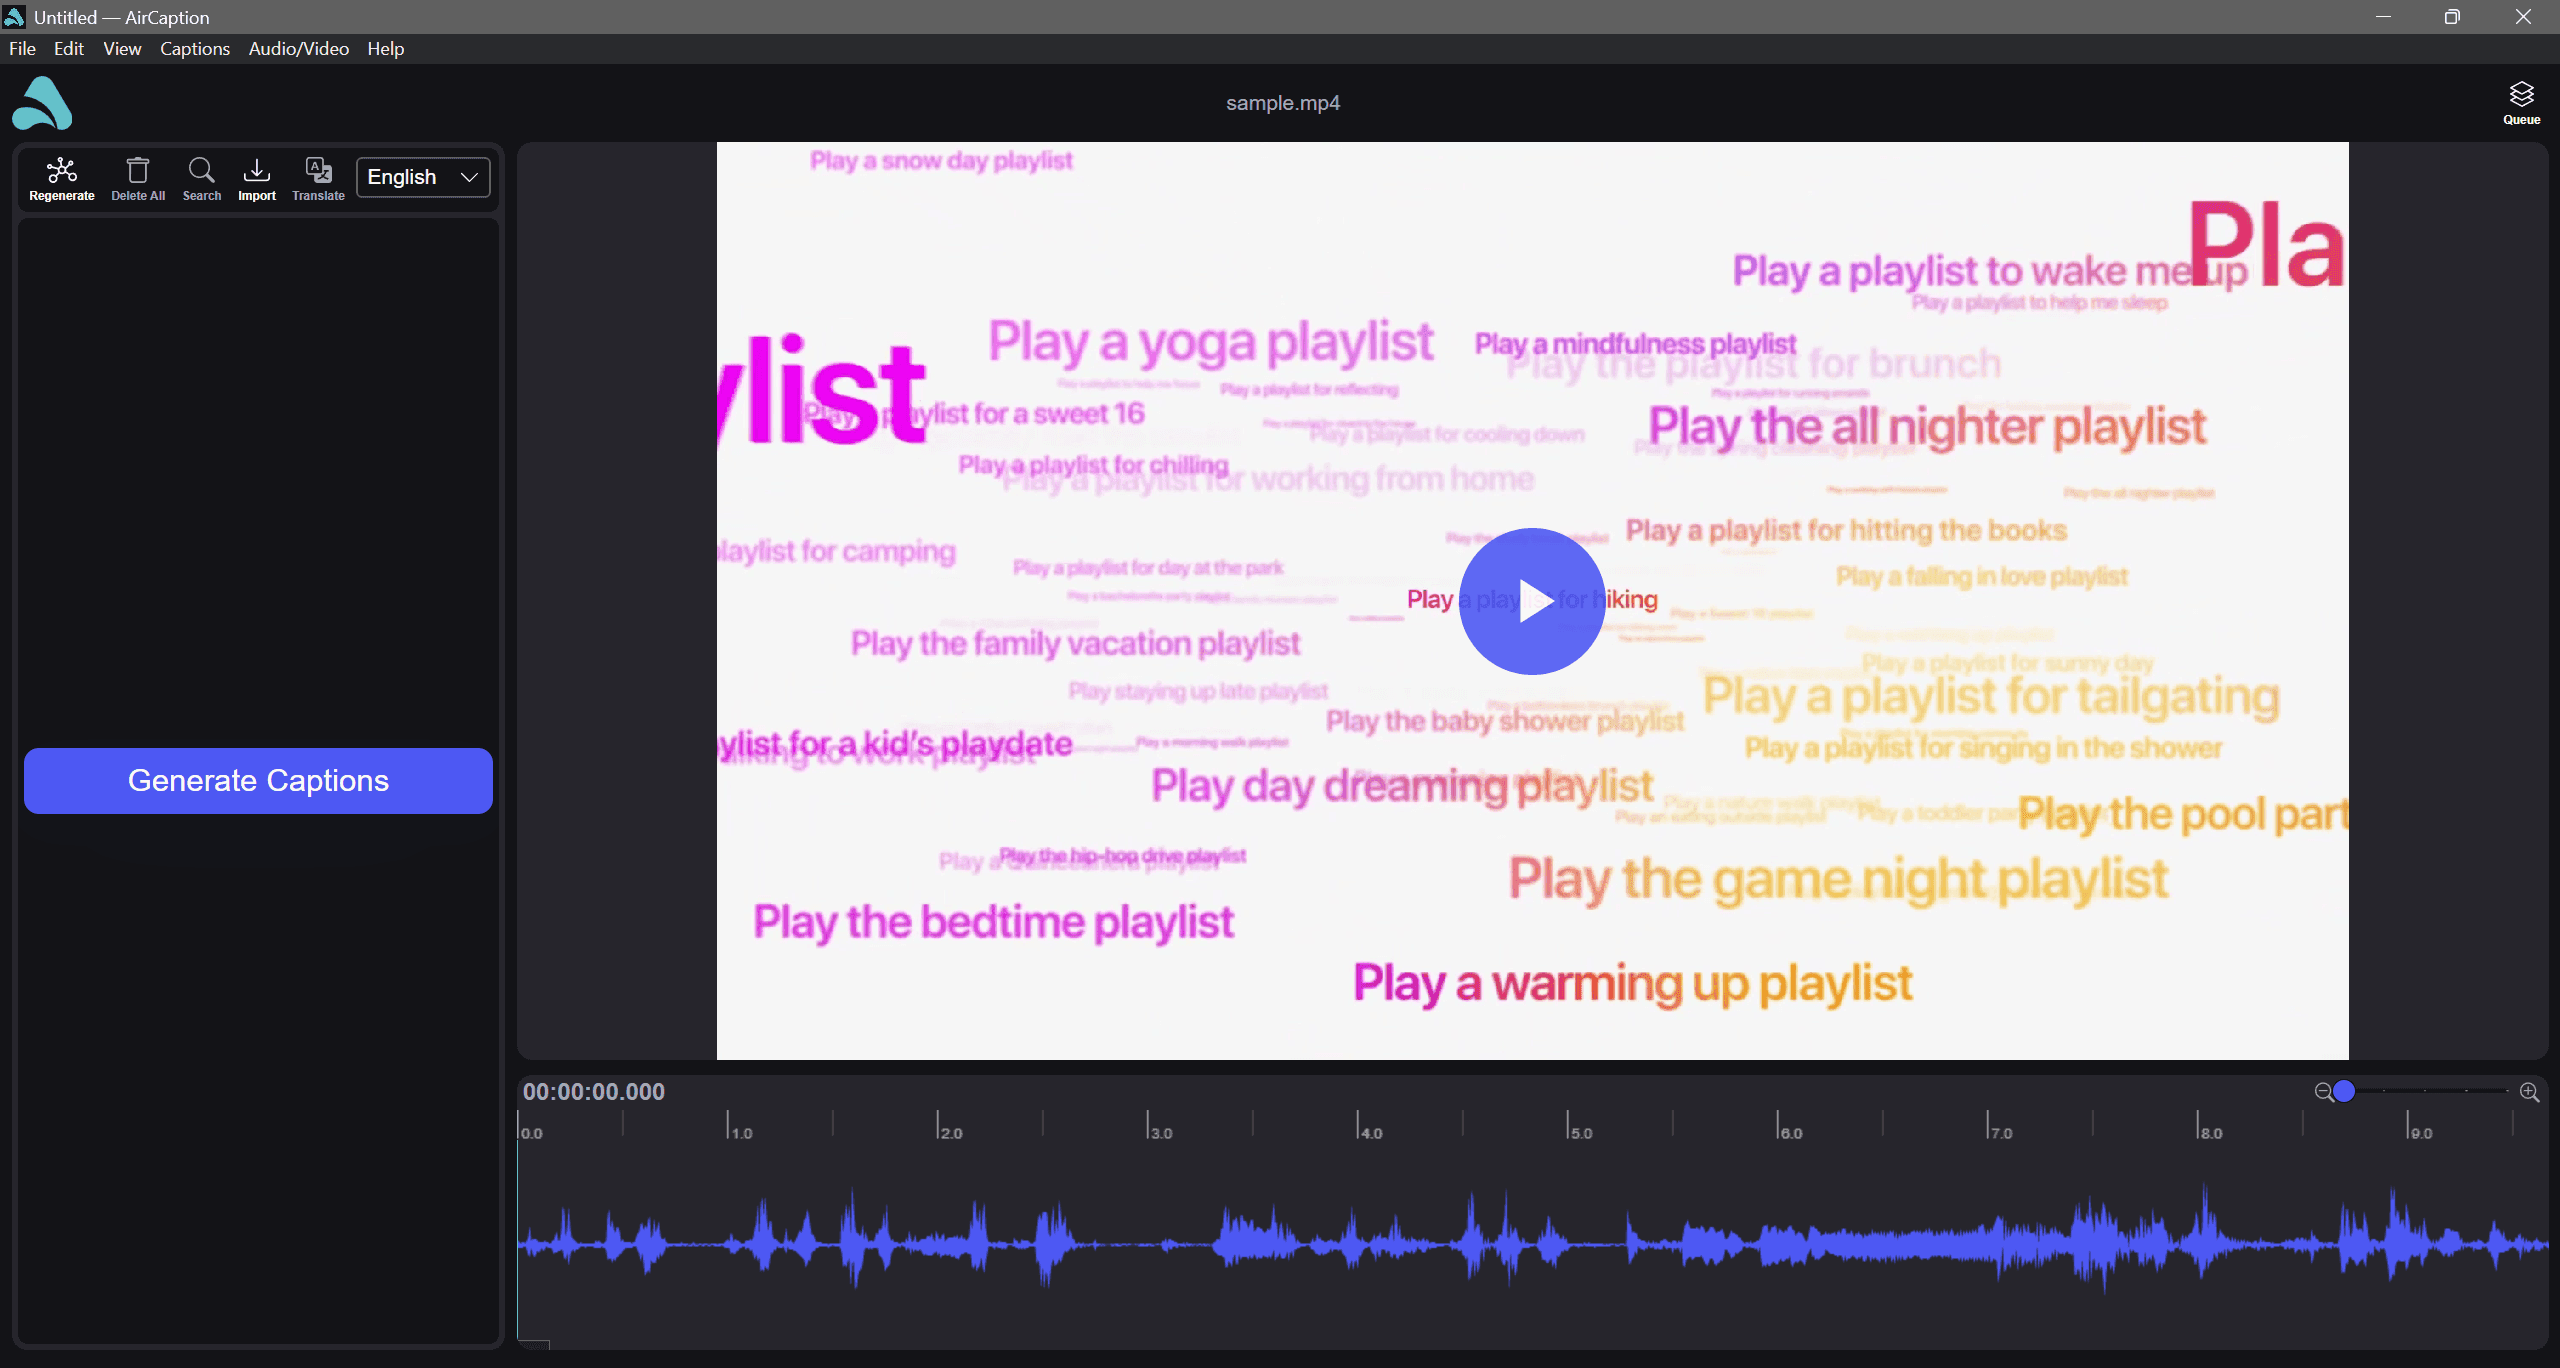
Choose the spoken language and an AI model
Click Generate Captions and the Job Settings dialog opens.
Set Media Language to what's actually spoken in the file. AirCaption doesn't detect it for you, and it's the same setting translation reads later, so it's worth getting right now.
Under AI Model, choose a model that supports the media language.
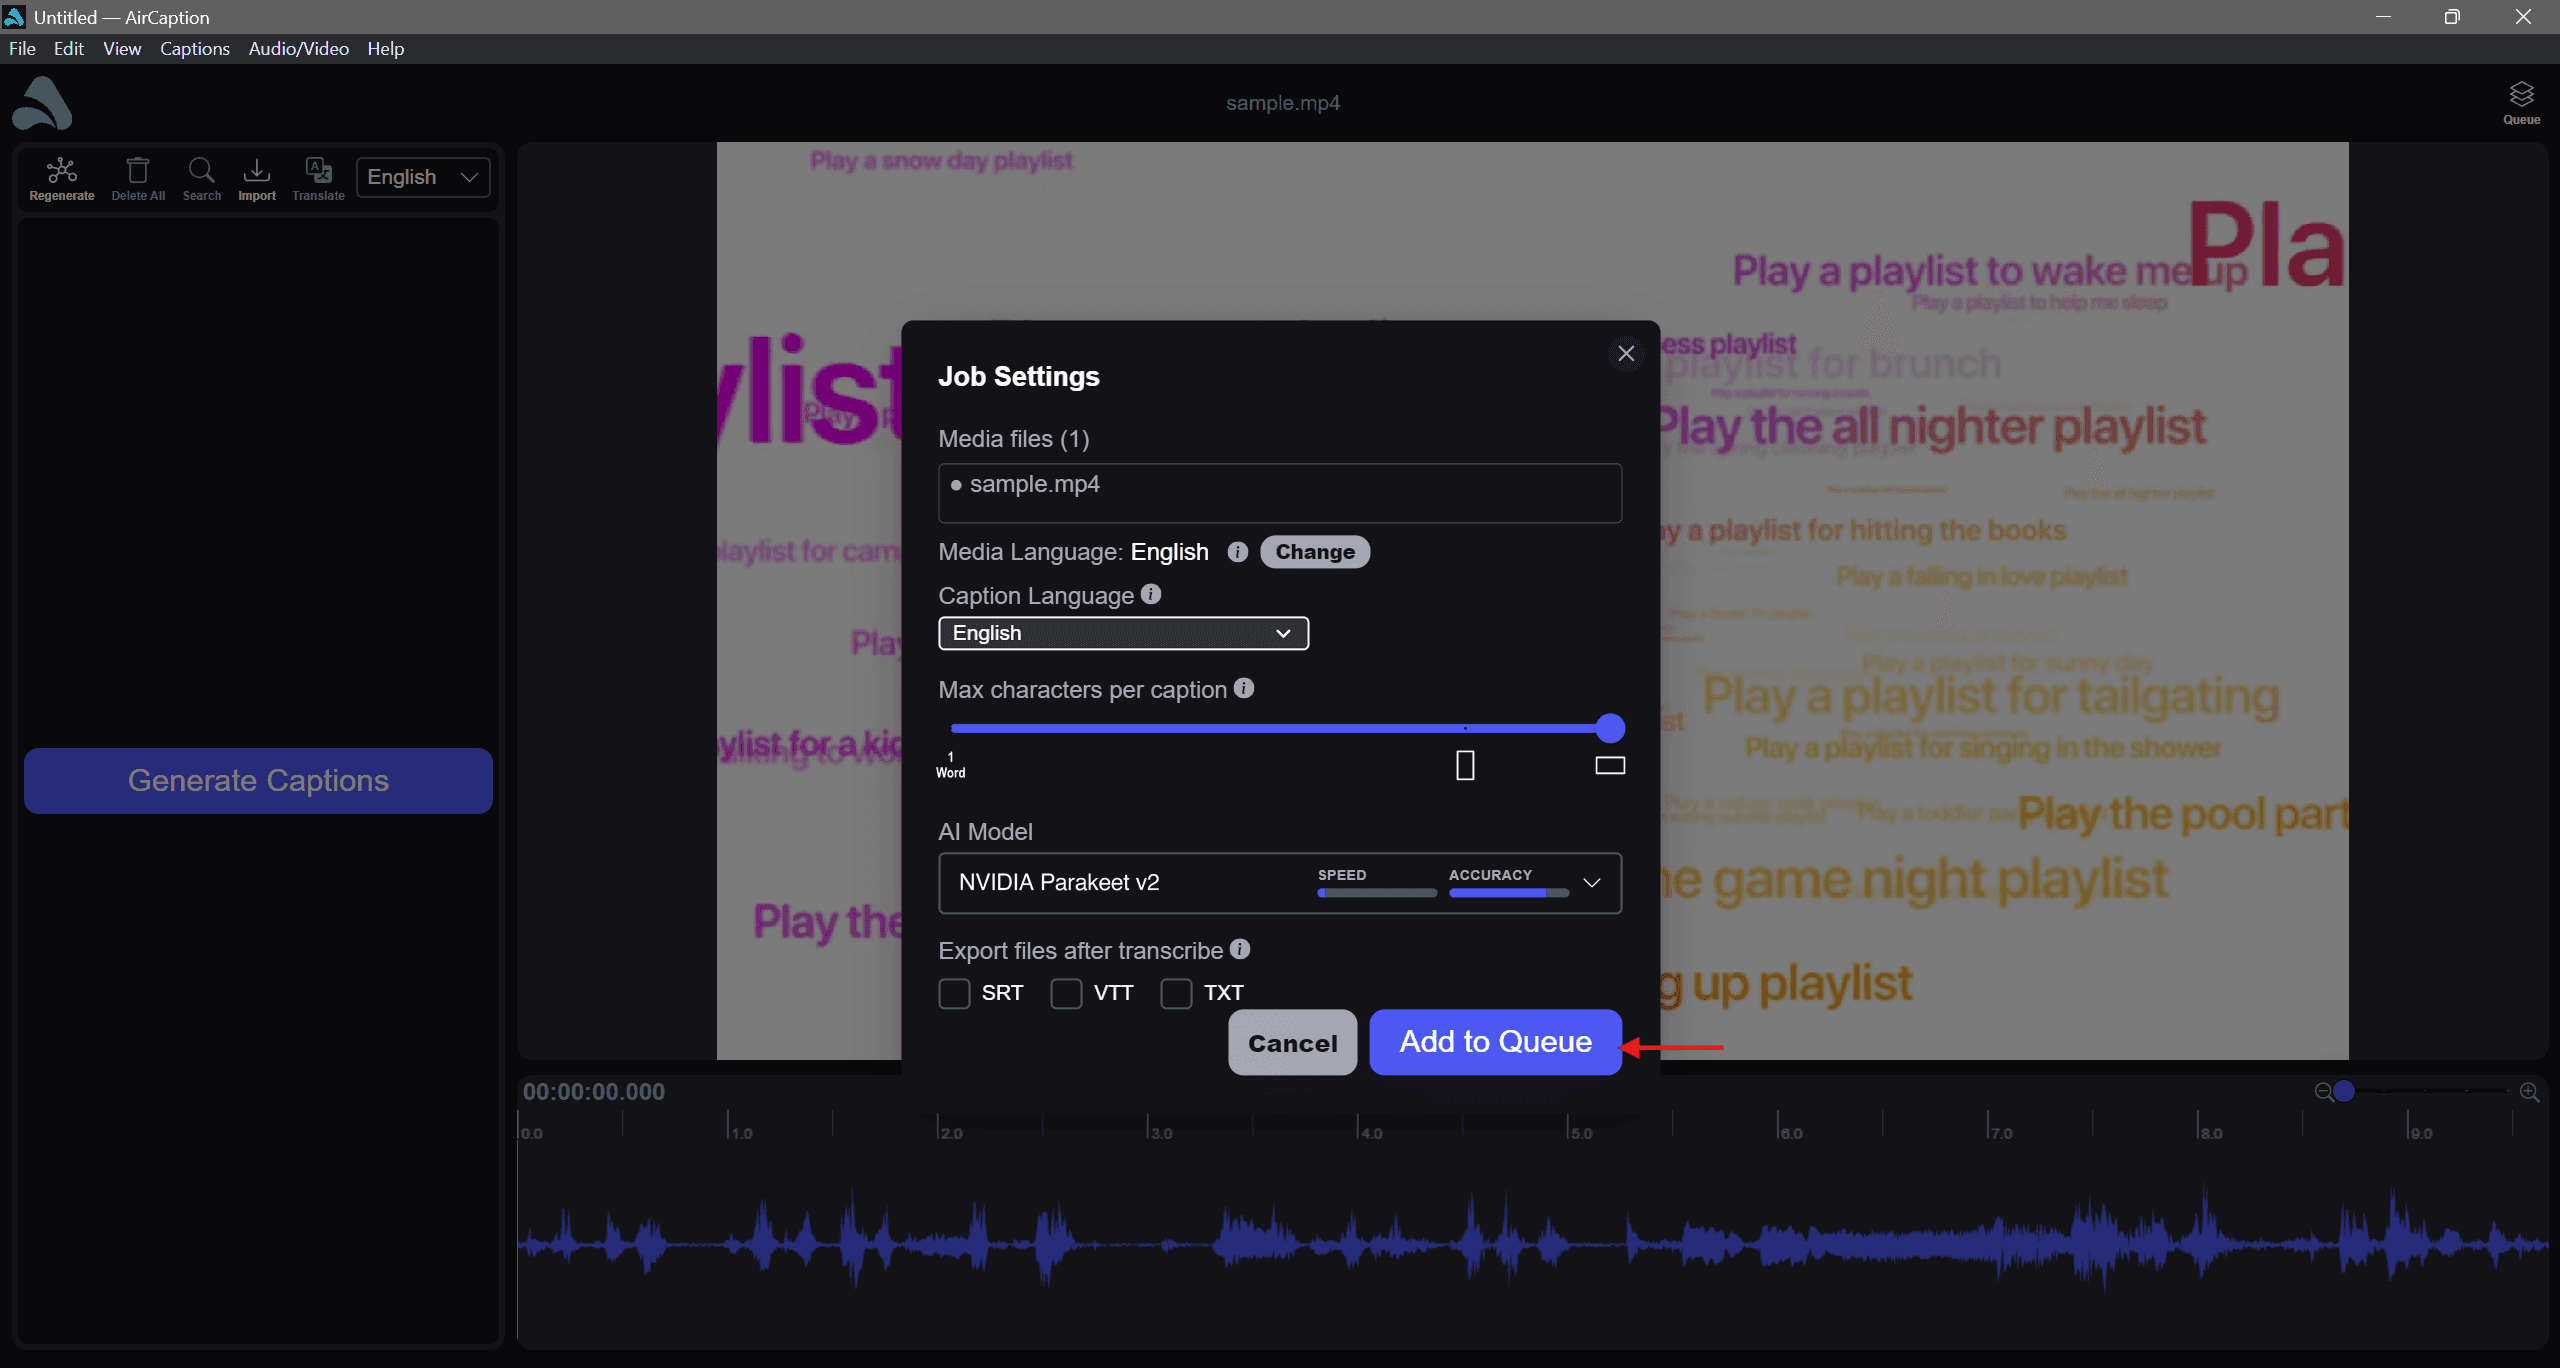
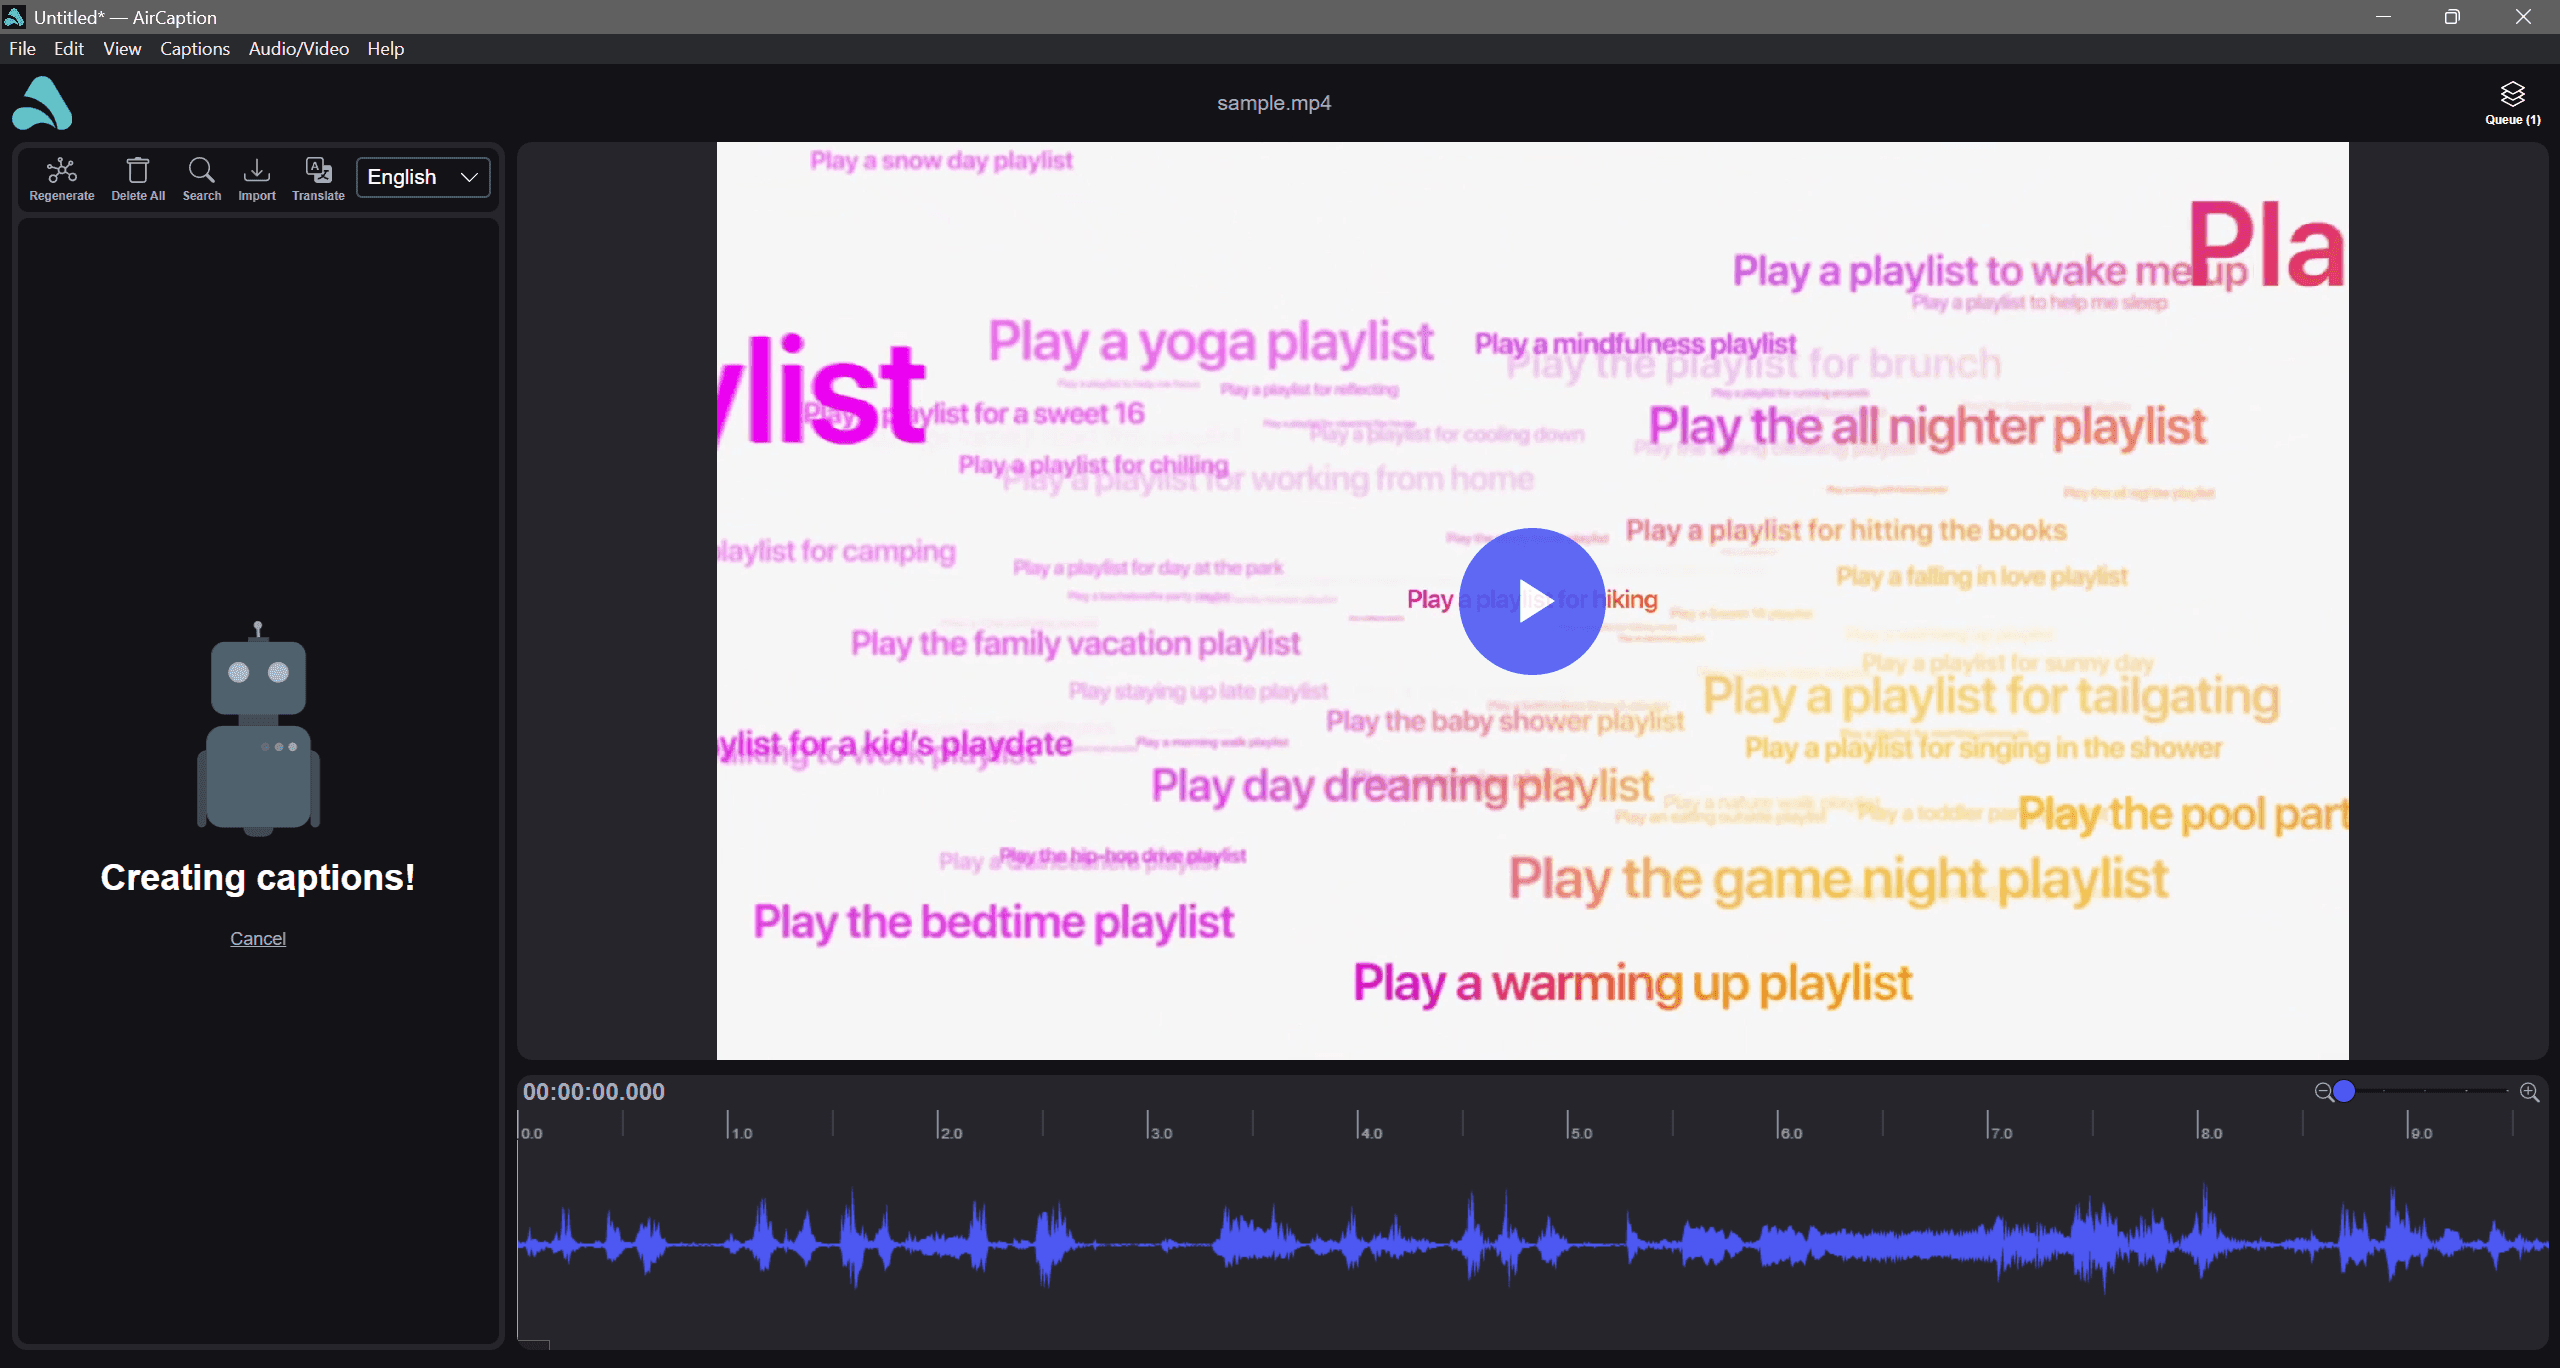
Generate the captions
Click Generate Captions and AirCaption gets to work.
This runs on your own machine, so there's no upload to sit through and no per-minute cap. Transcribe as much as you like. The first run downloads the model you picked (if not already downloaded).
Review and edit the captions before you translate
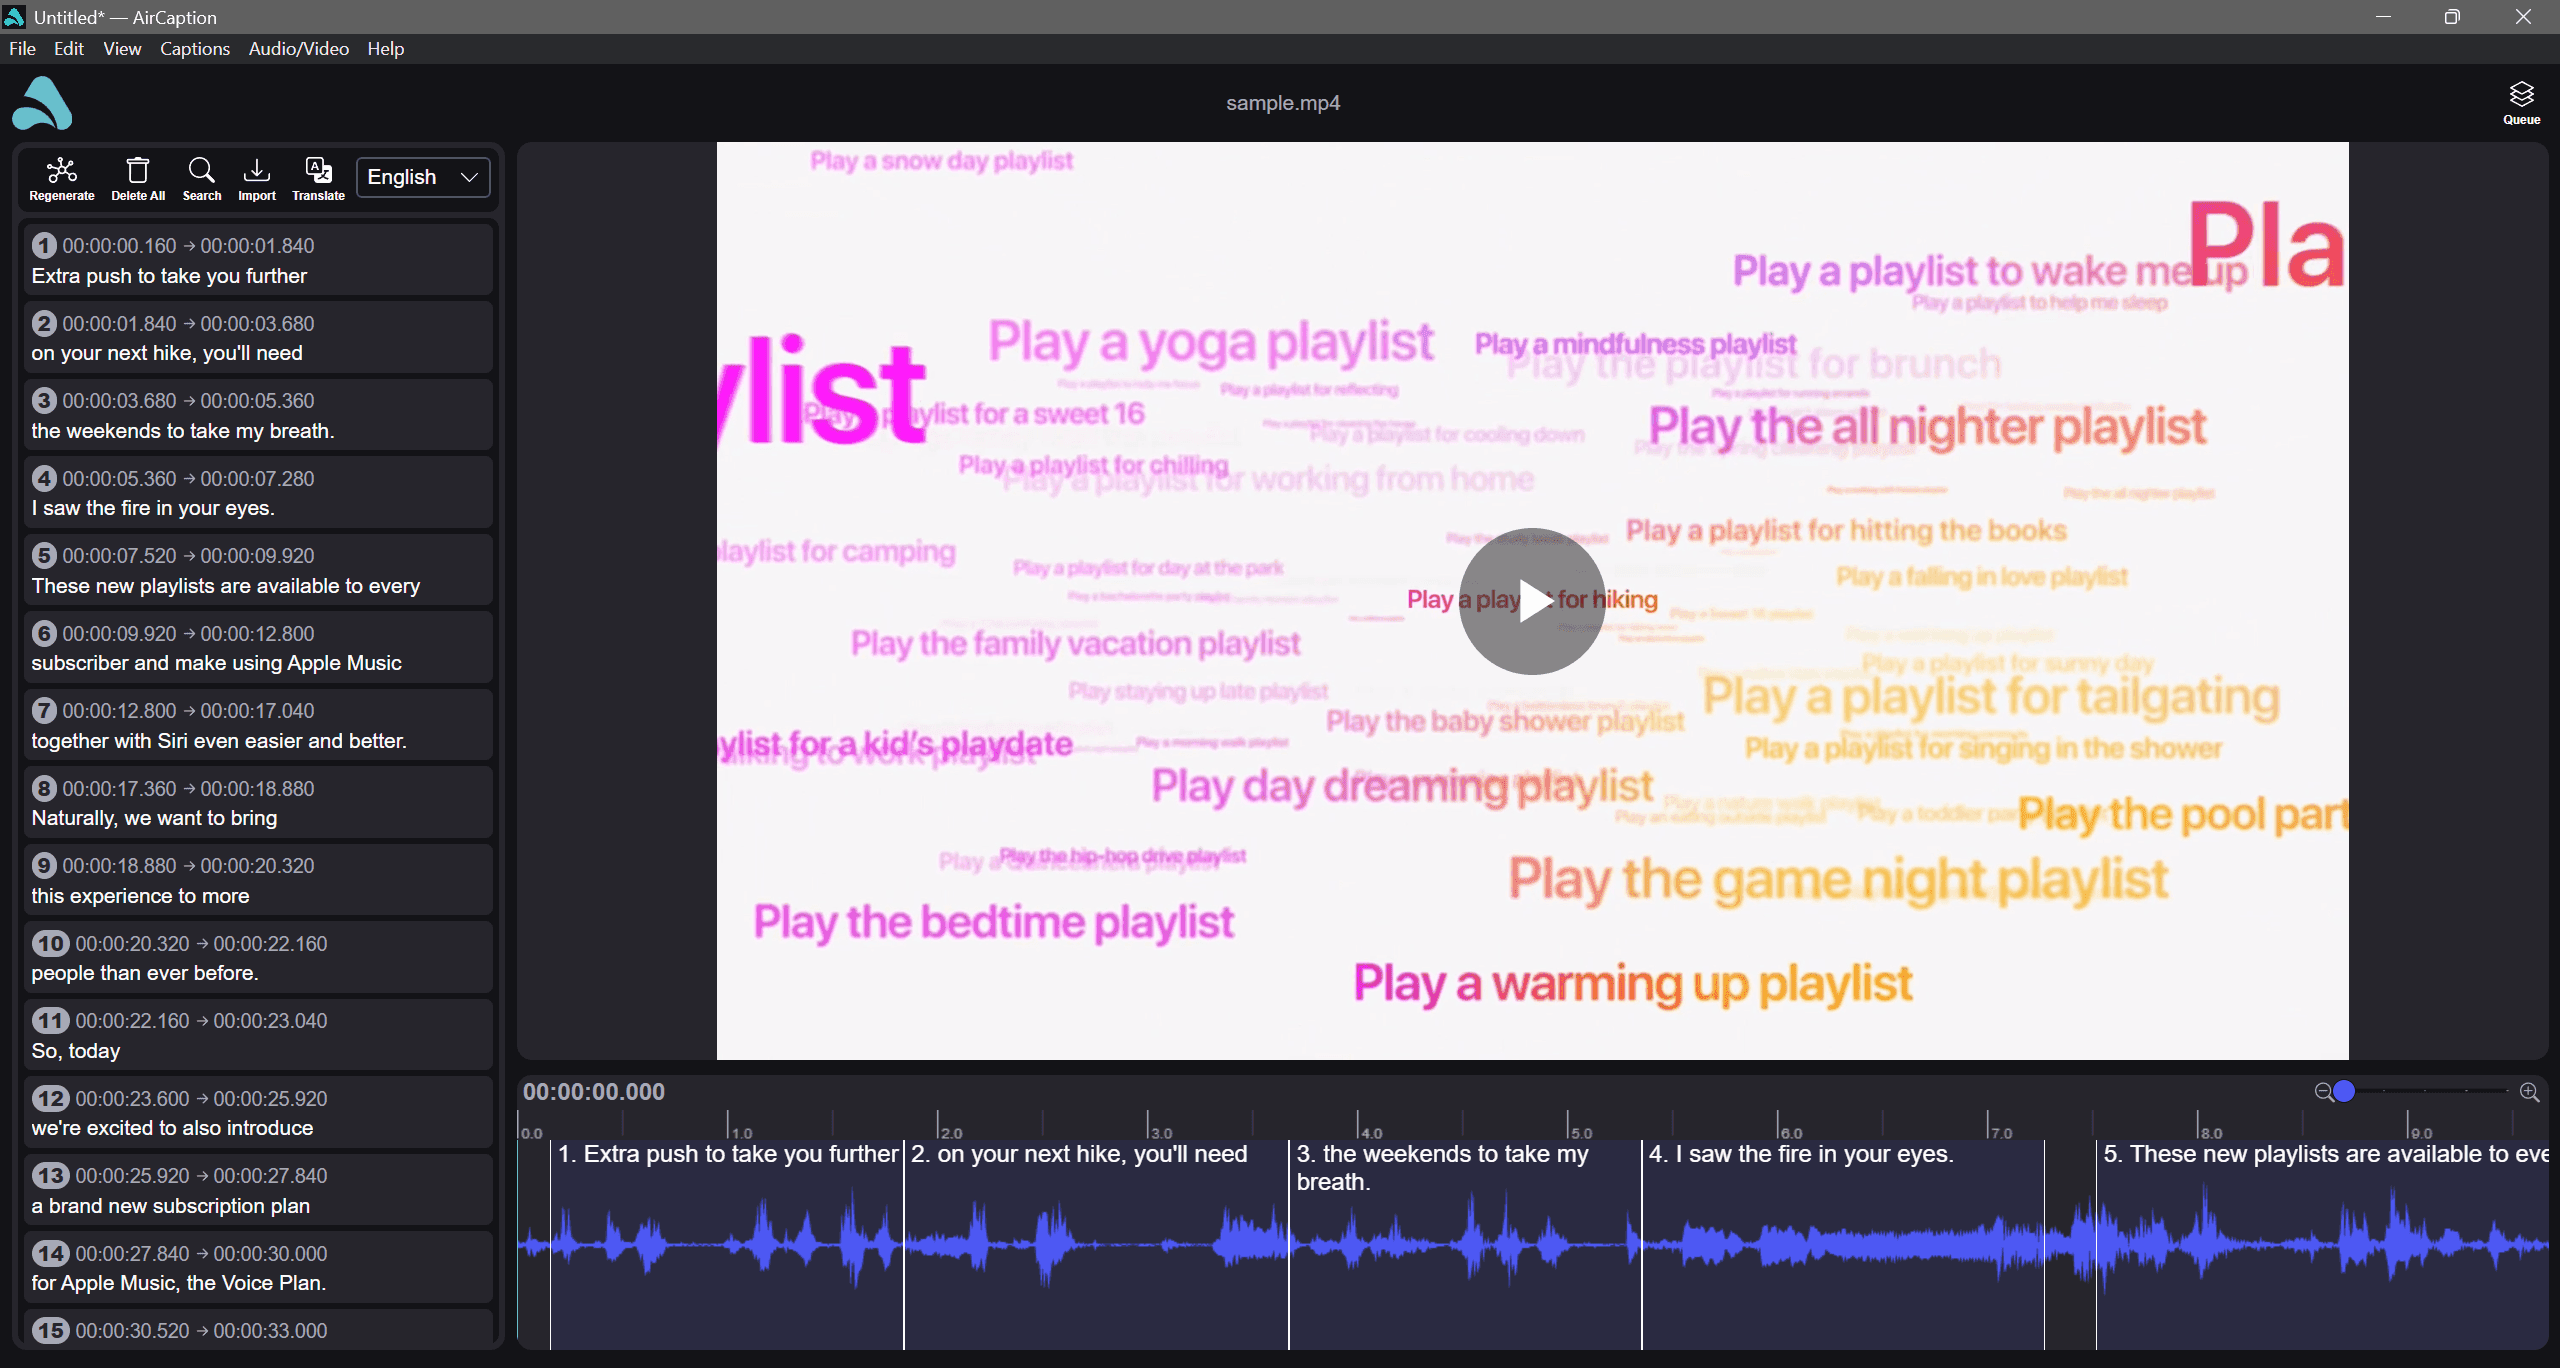
The captions fill the left panel and appear on the waveform. Click any timestamp to jump time, and edit the text in the left panel or by clicking on it in the video player.
Read it through before going further. A misheard name, a technical term, a piece
of punctuation: anything wrong here gets carried into every language
you translate into, so fixing it once now is faster than fixing it
in multiple languages later. Edit → Find and Replace (Ctrl+F, or Cmd+F on a
Mac) is the quick way to correct a name that recurs.
Part 2: Turn those captions into subtitles
Open the language list
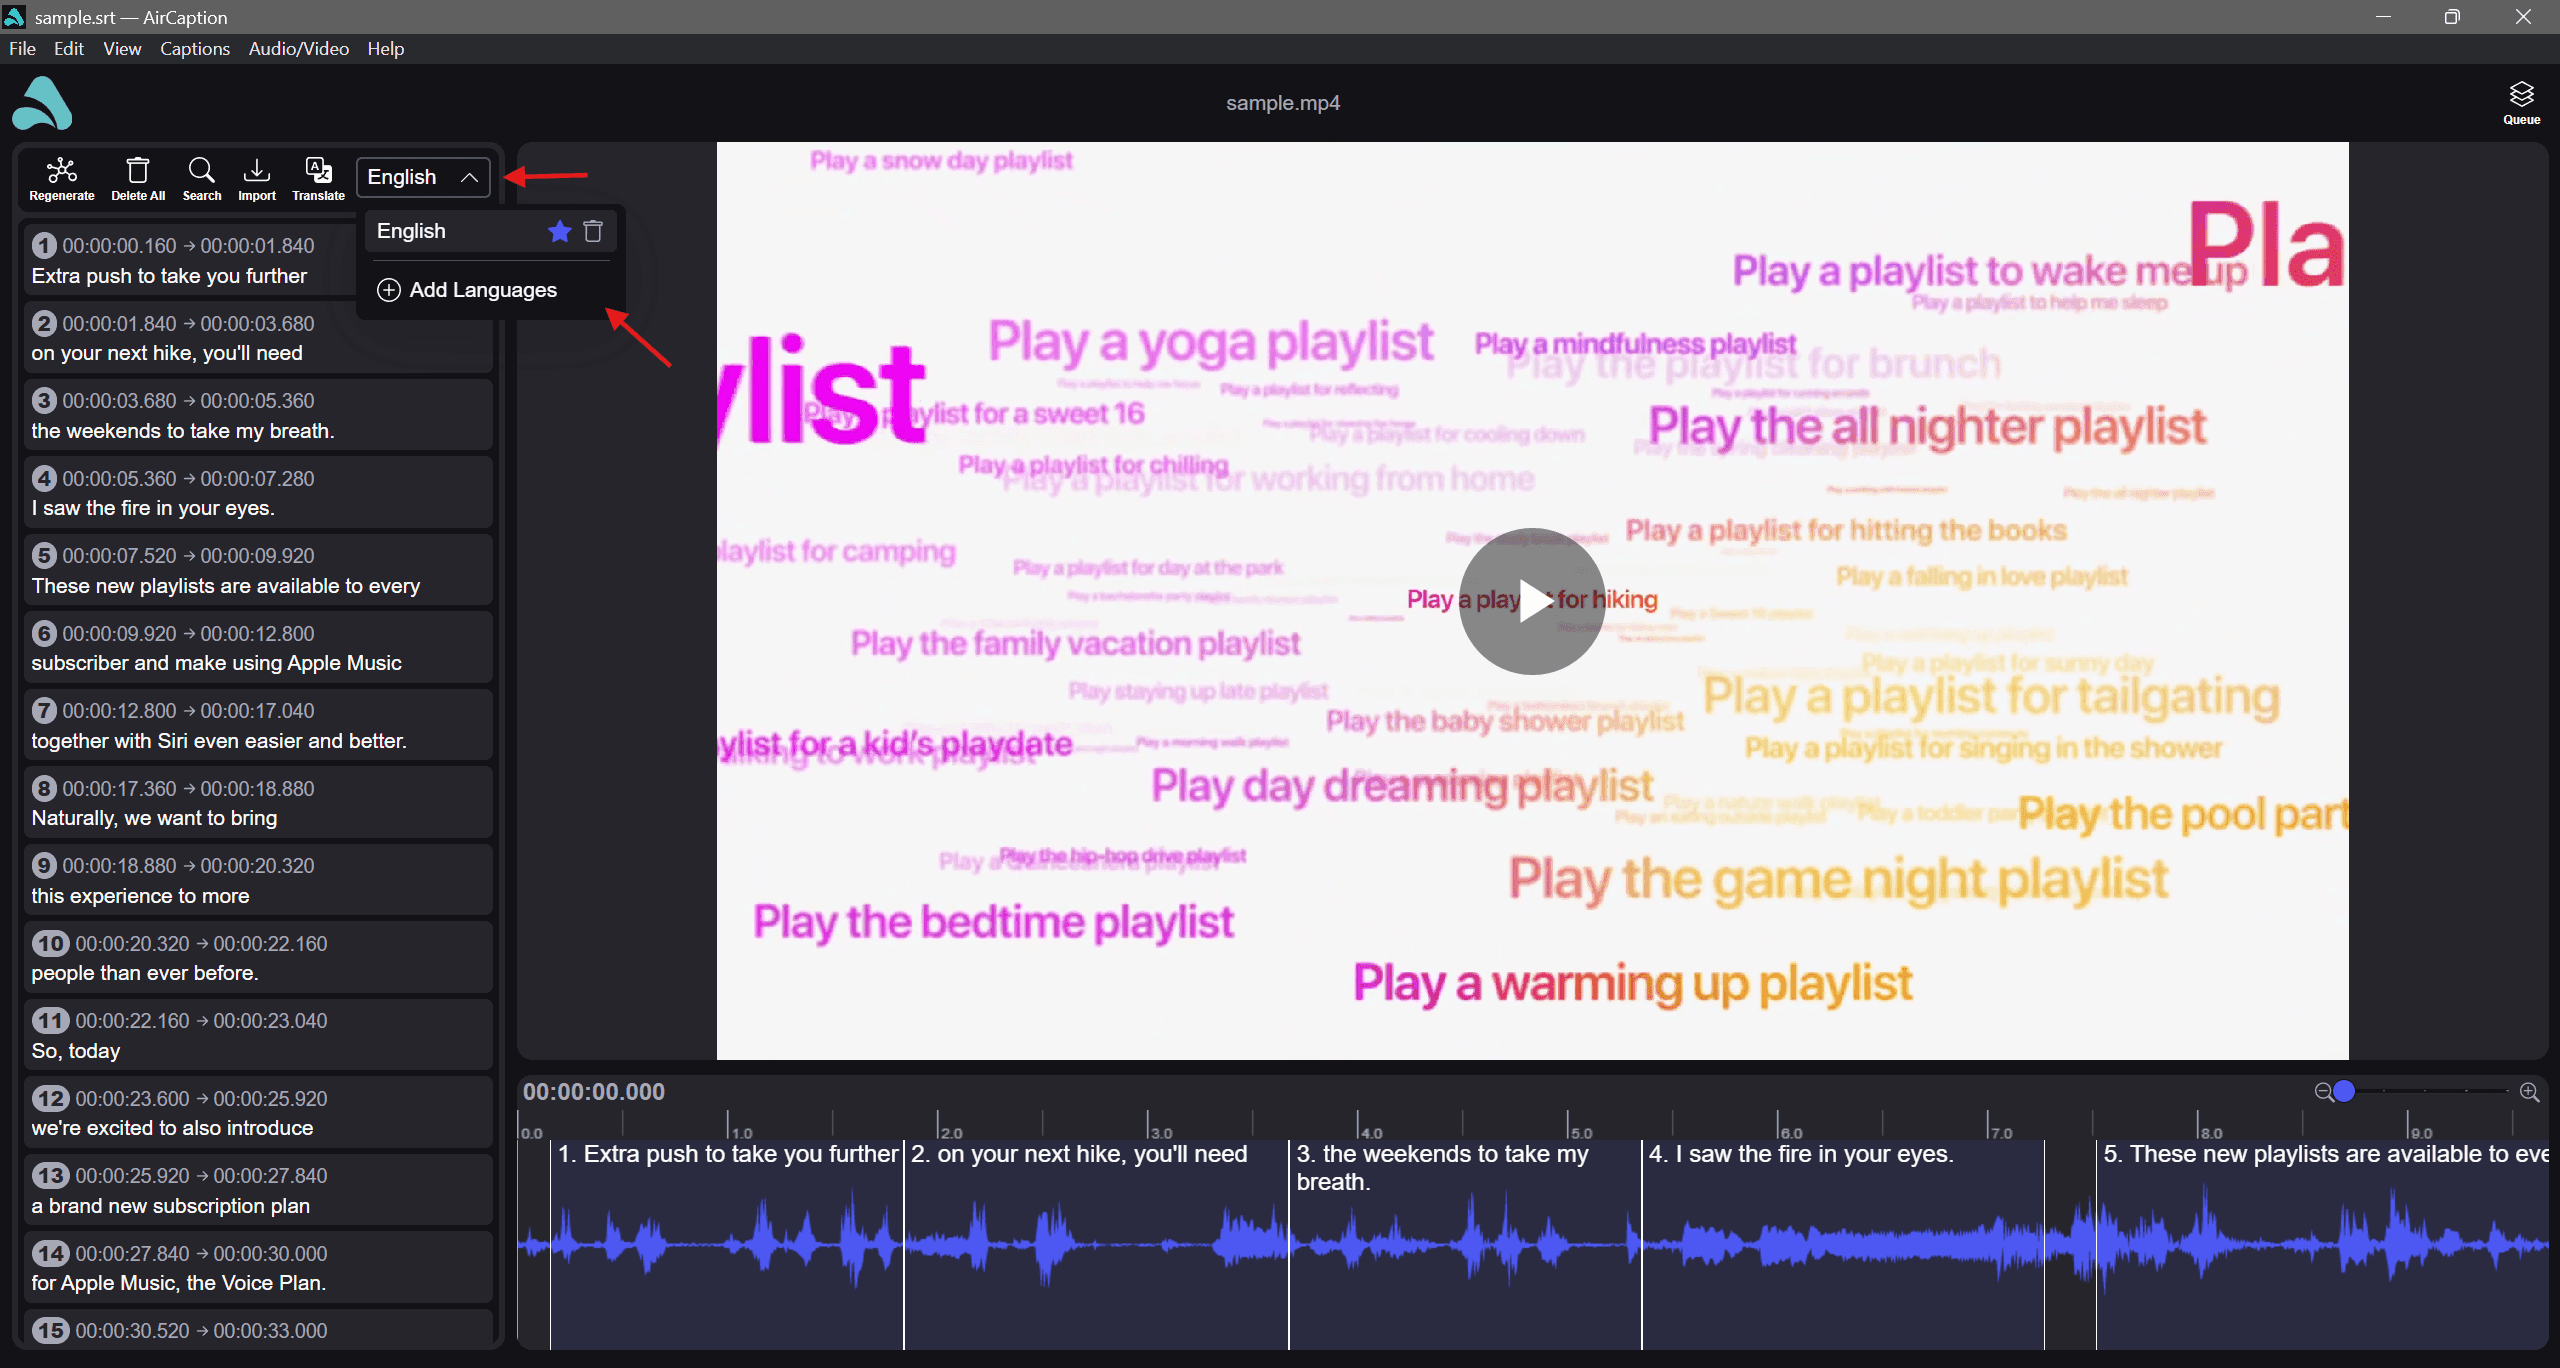
Above your captions is a dropdown showing the language you transcribed in. Open it and click Add Languages.
Pick your target languages
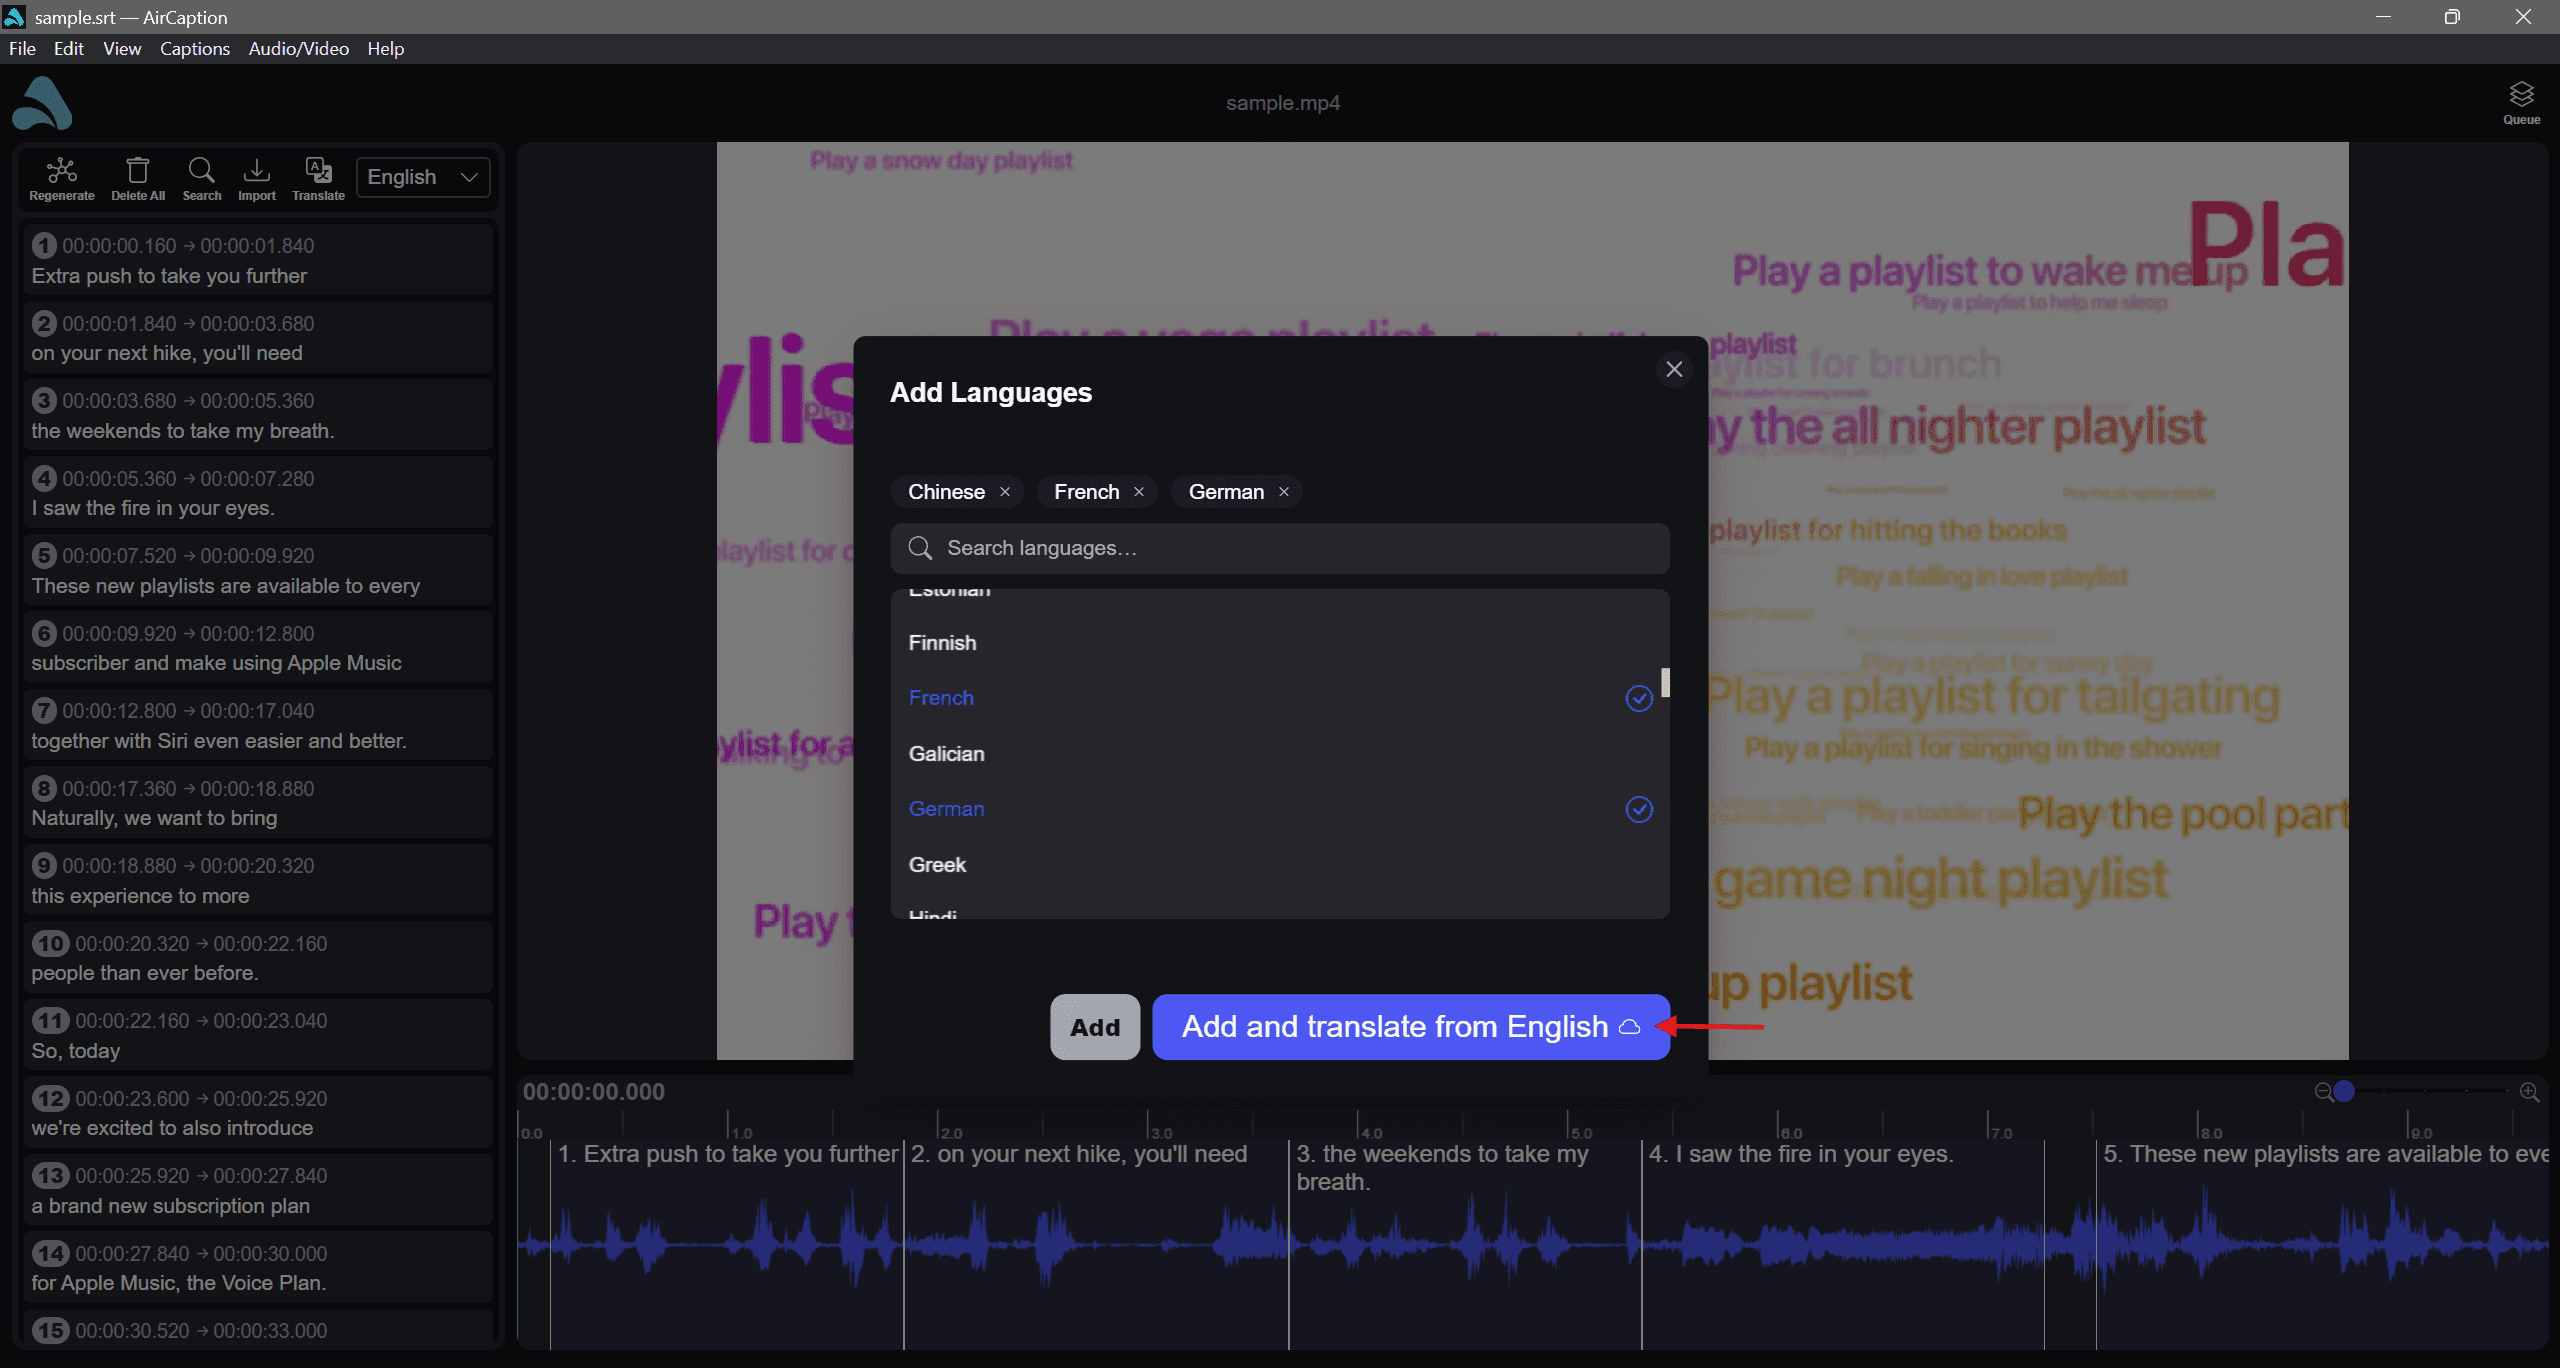
Search for a language and click to add. Add as many as you would like. AirCaption knows more than 80 languages and translates between any two of them.
Then click Add and translate from (media language). This creates a track for each language and takes you straight to the job settings.
Check the settings and translate
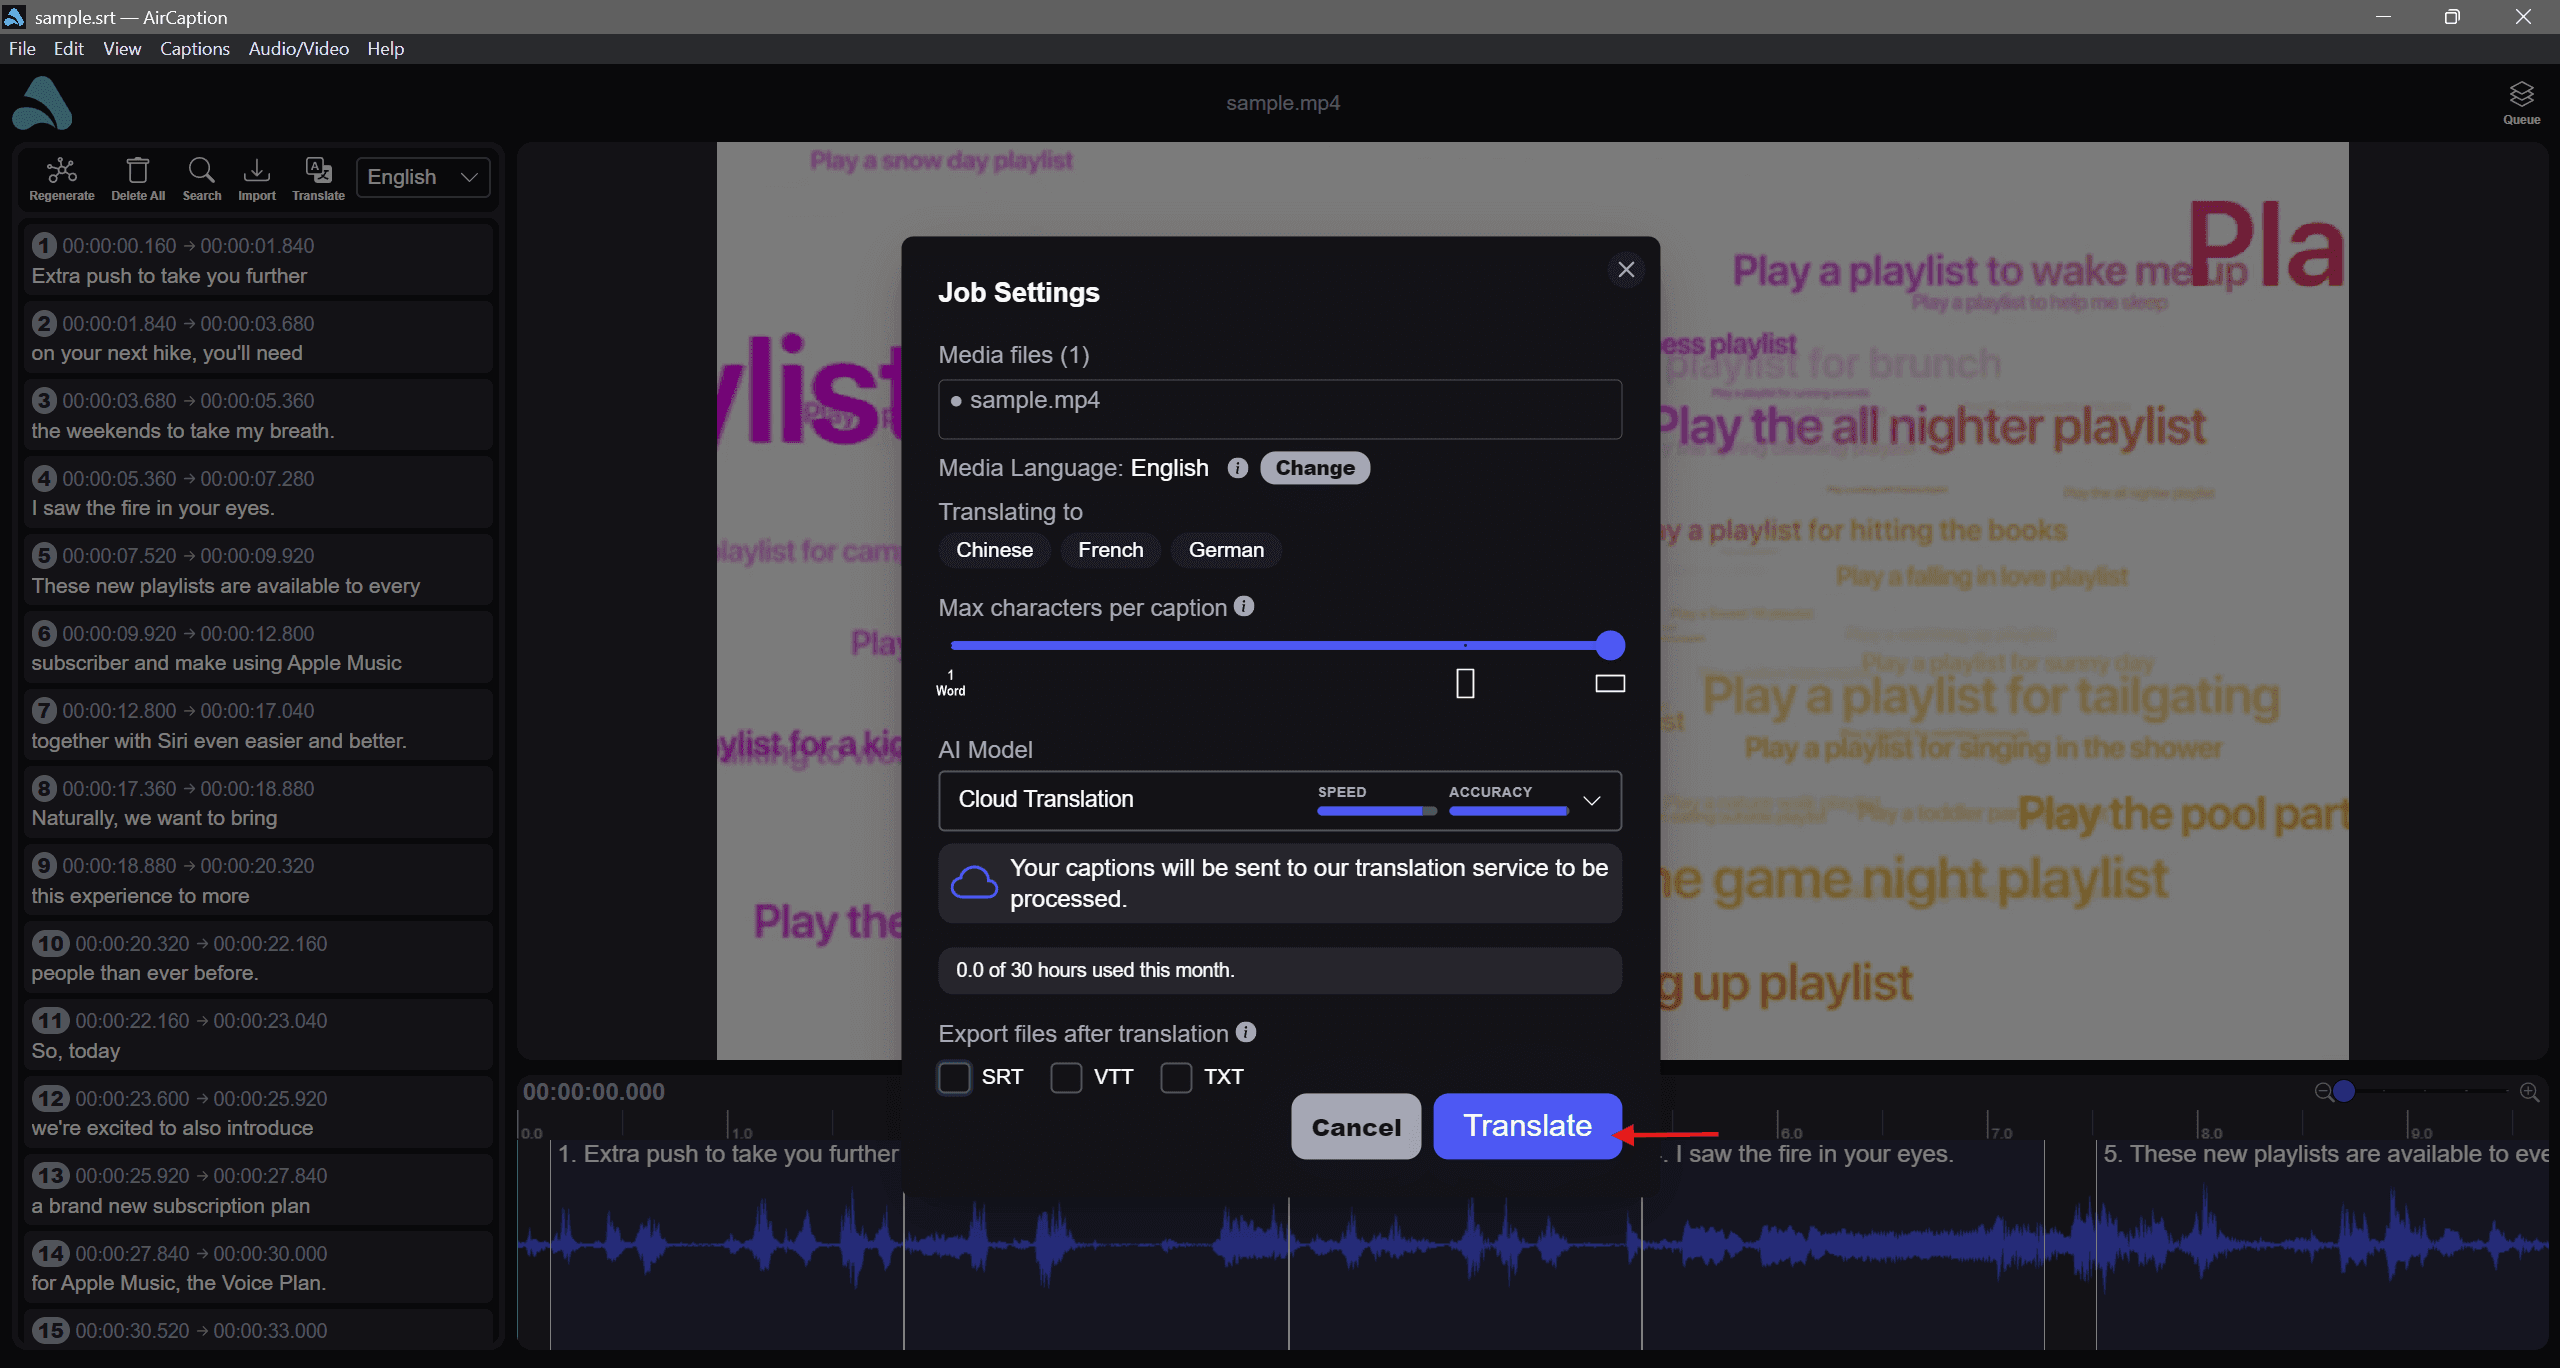
The Job Settings dialog opens with everything preset for translation. Four things are worth a look:
- Media Language is what you're translating from. If it's wrong, click Change before going further.
- Translating to lists your target languages. Each one runs as its own job.
- AI Model is already set to Cloud Translation.
- Max characters per caption sets how long each caption line can run. The slider is marked for vertical and widescreen video, and the default suits widescreen.
Tick SRT, VTT, or TXT under Export files after translation and AirCaption writes those files next to your media as each language finishes. Just above that, it shows how much of your monthly allowance is left.
Click Translate. Please note that your captions will be sent to AirCaption's translation service to be processed. Each language starts as its own job which you can view in the queue in the top right.
Part 3: Get your subtitles back
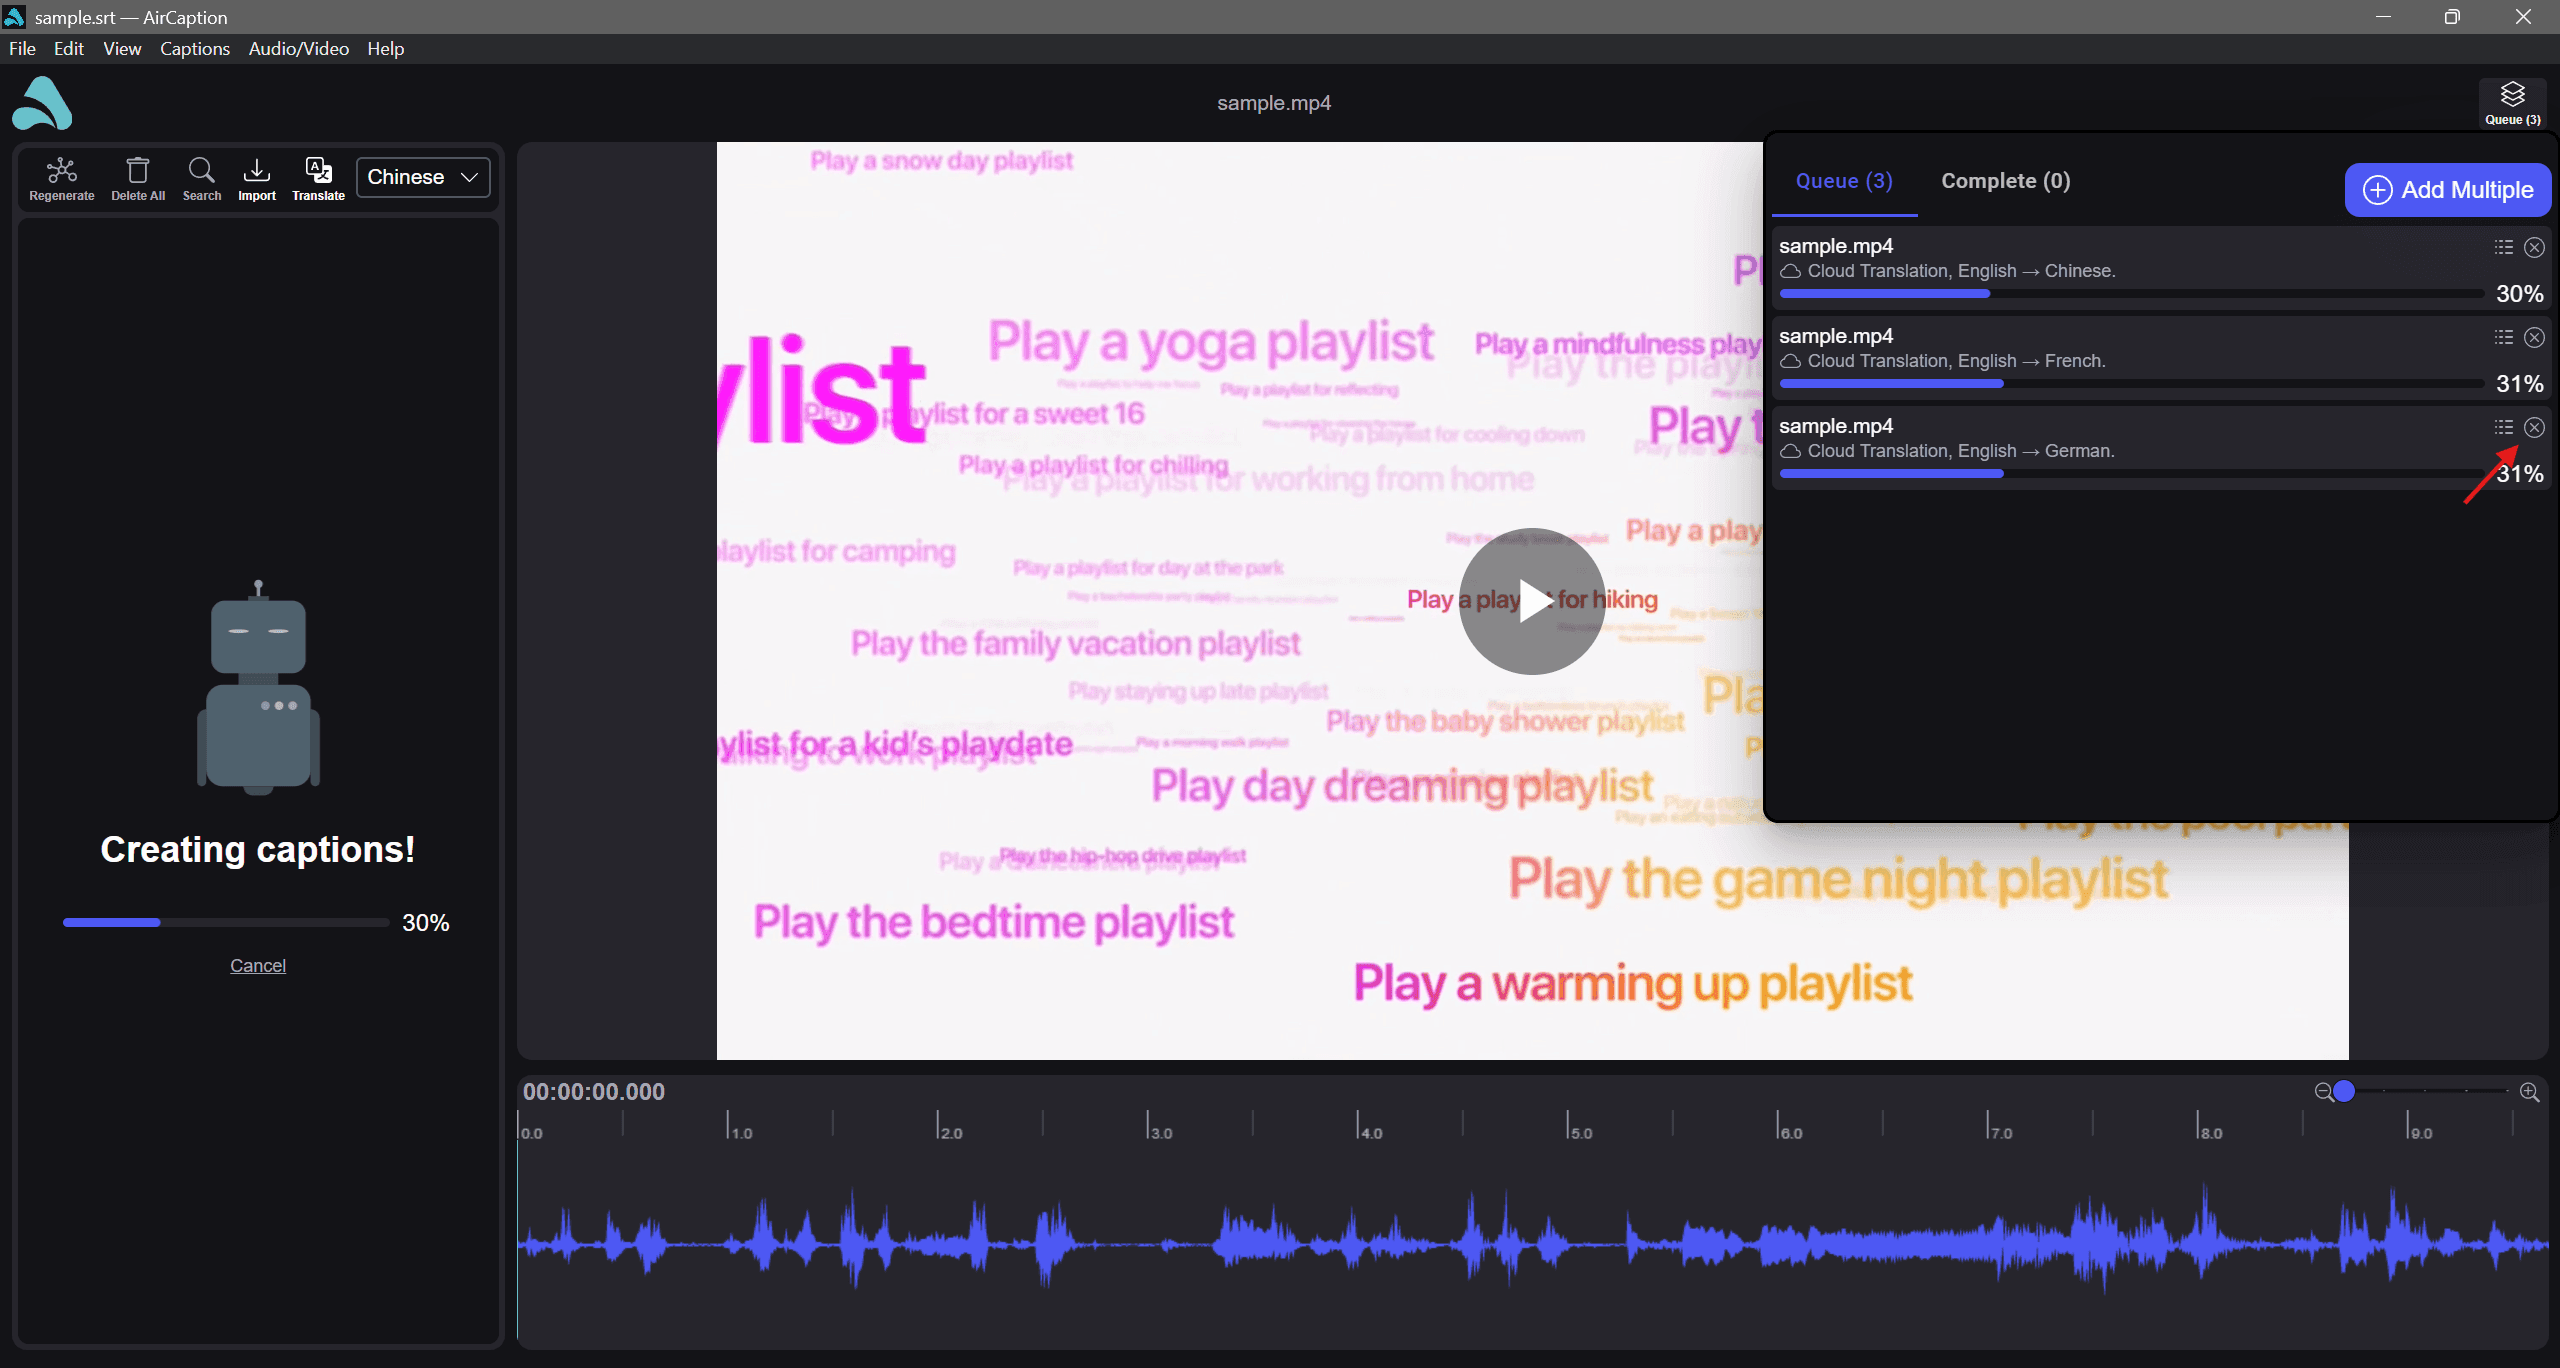
Watch progress in the Queue
Open the Queue from the header. Each row shows its language pair and a progress bar.
Translation runs on our servers rather than your machine, so you can carry on editing, start another transcription, or close the project while it works. Expect a few minutes per language.
To stop one, click the cancel icon at the right of its row.
Add the translation to your project
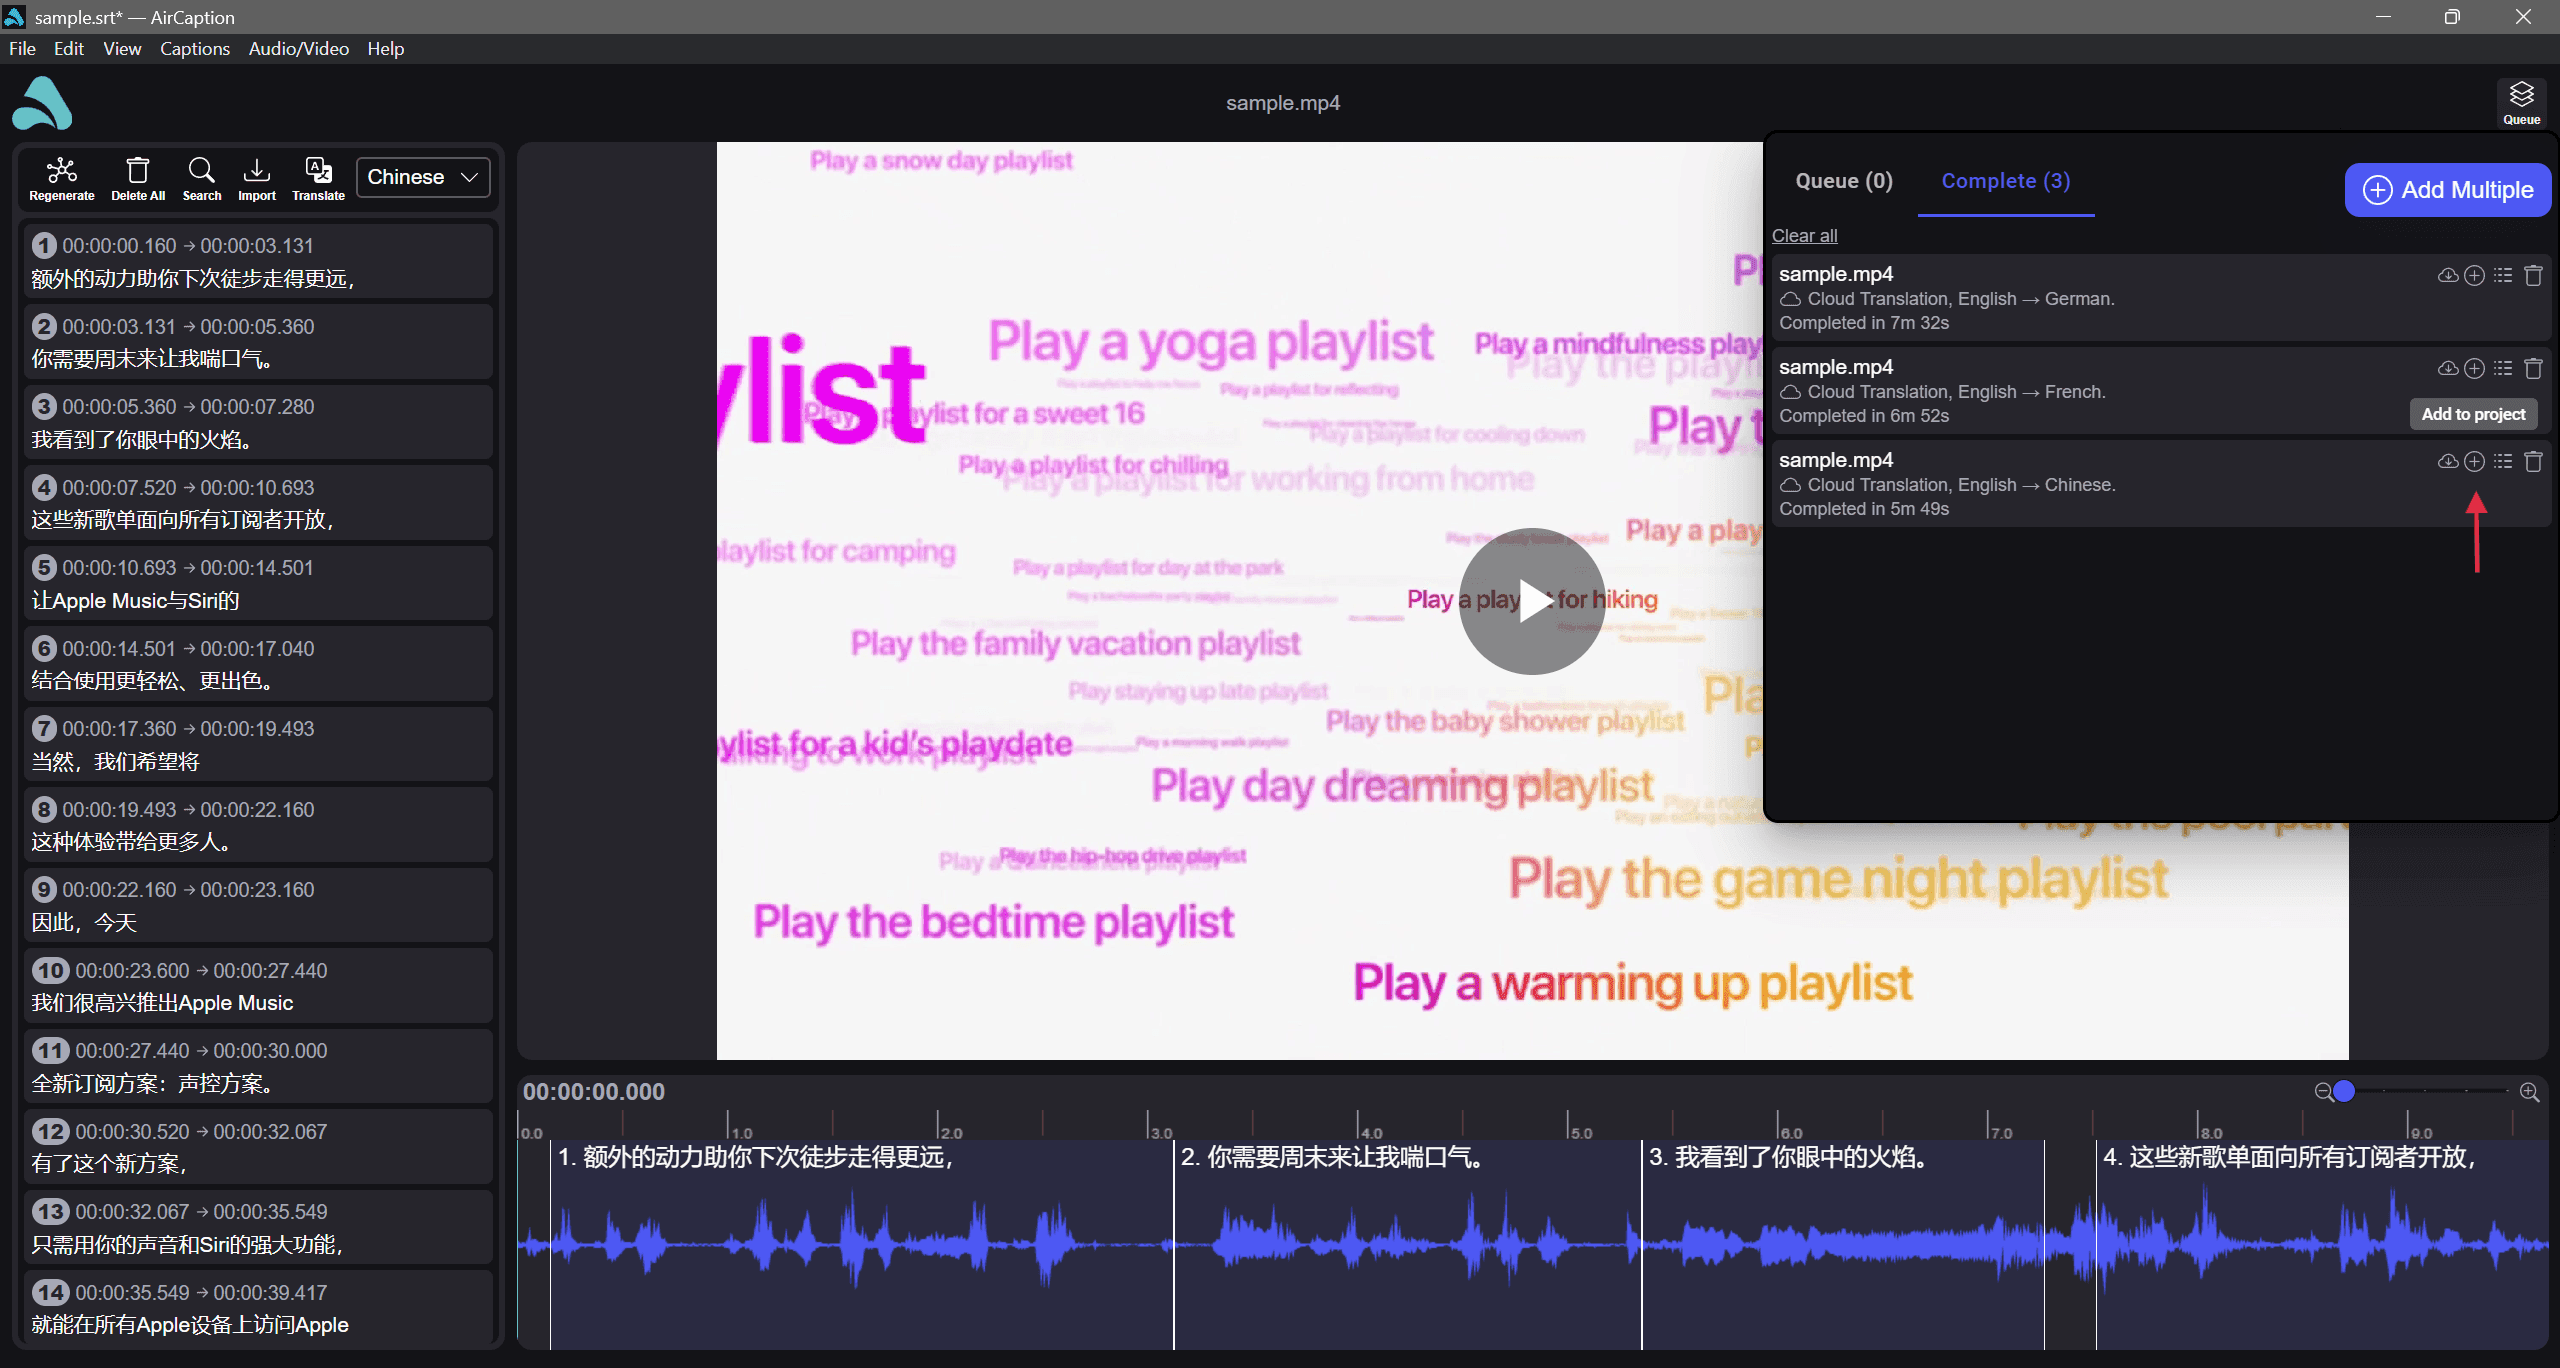
If the project is still open when a language finishes, AirCaption adds them to the project.
If you close and come back later, open the Complete tab and use the Add to project button on the row to add them to the project.
Save the subtitle files
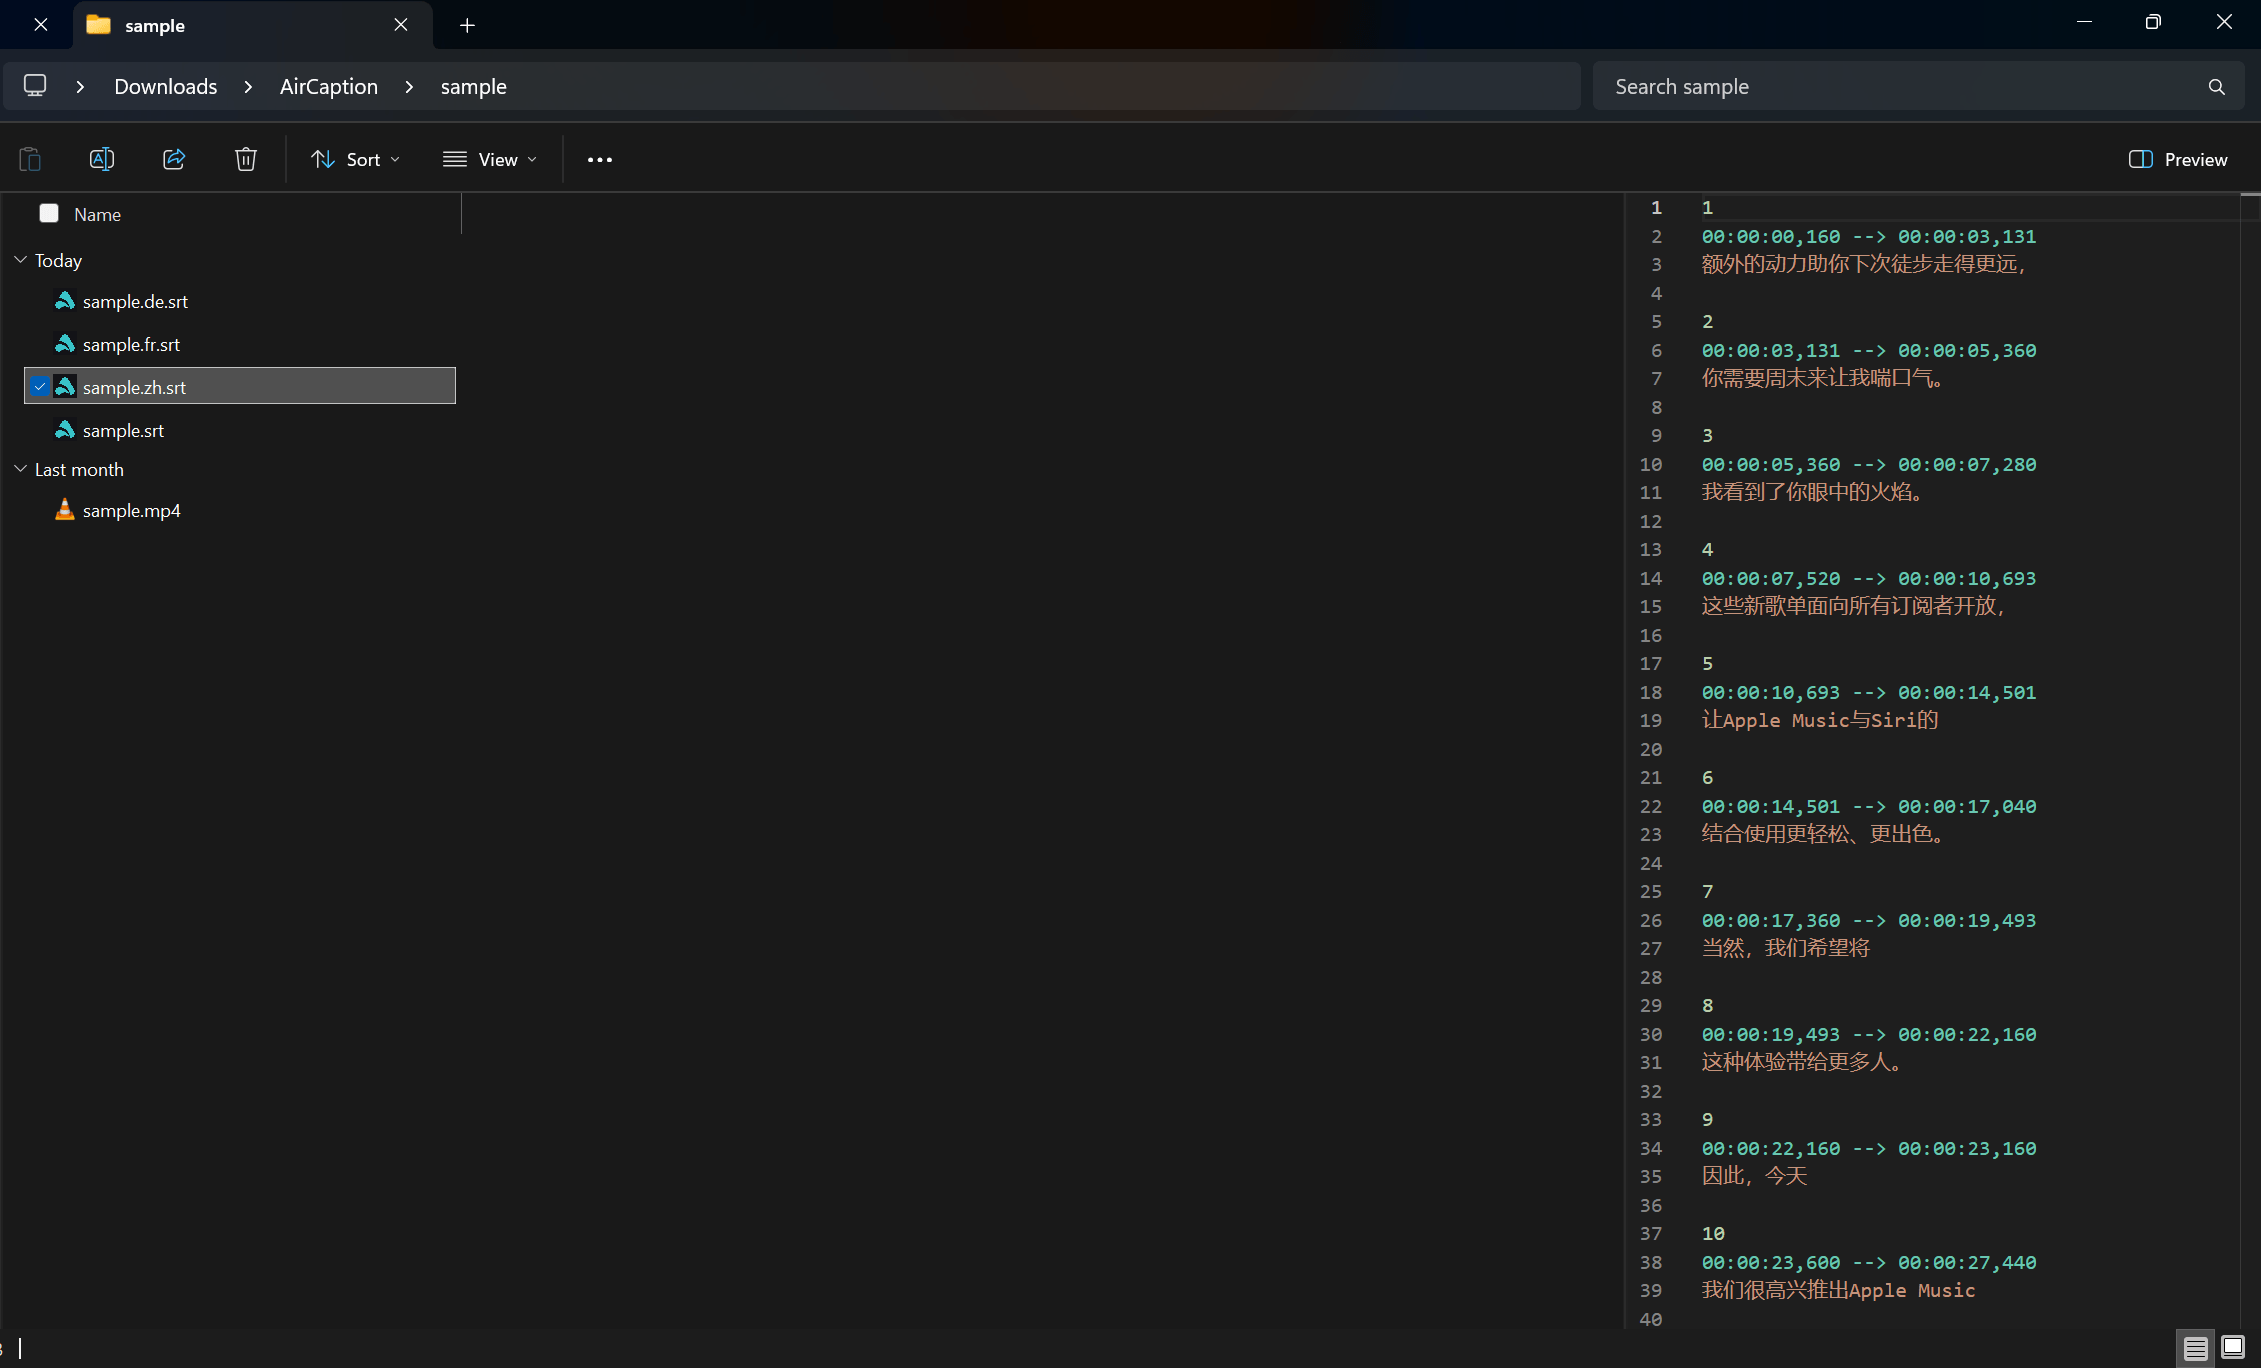
If you ticked an export format in the job settings, the files are already sitting
next to your media, named for their language: sample.de.srt, sample.fr.srt,
sample.zh.srt. Otherwise, press File, Save to save all caption files.
That's it. One transcript, and an audience that no longer stops at the edge of your own language. If you run into trouble, reach out to us.